
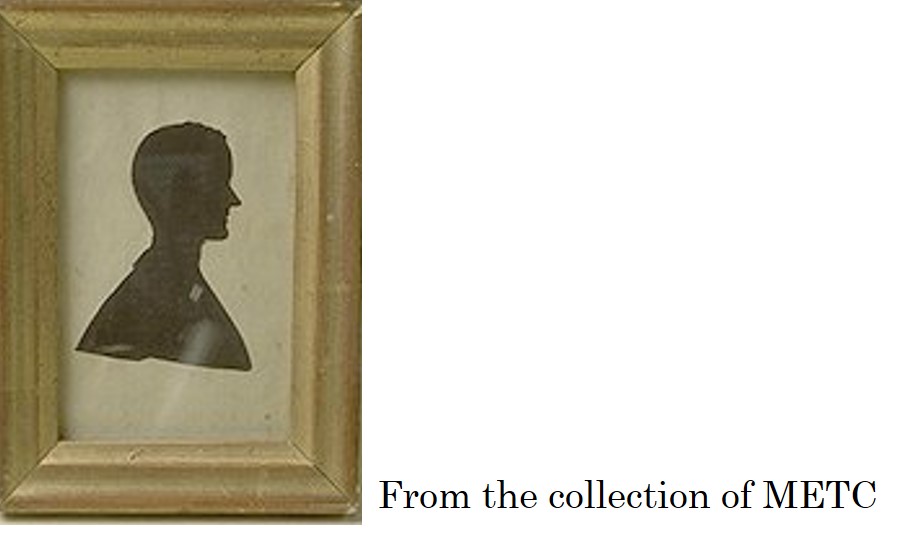
Before photography was invented, a silhouette drawing was a way to make an image of someone who couldn’t have a painting or drawing of themselves made. Instead than showing all the details of the person, a silhouette shows just the shape or outline of the person or item being drawn.
Here is an example of what a silhouette drawing of a person might look like:
You can make your own silhouette of a person or object!
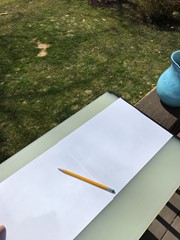
It has to be a sunny day for this to work.
Materials you will need
Pencil
Paper
Some kind of hard, flat surface to act as your easel (cutting board, thick cardboard, clipboard)
Sun!
Crayons/ markers (optional)
Step 1:
Pick the item you want to draw.
Step 2:
Set up the item in a way that you can clearly see the shadow on a stable surface.
Step 3:
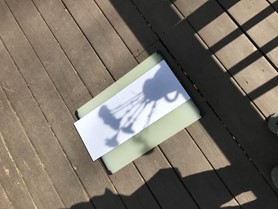
Prepare your drawing materials. I taped two pieces of printer paper together and then taped that to a cutting board to act as my easel.
Step 4:
Position your easel so that the shadow of your image falls onto it.
Step 5:
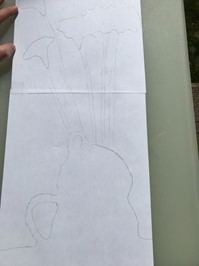
Give yourself enough space to trace the image with your pencil, you may need to angle your body different ways so you don’t block the shadow with your body.
Step 6:
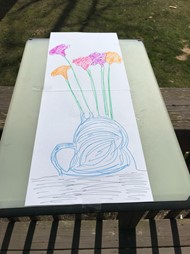
If you want to add some color, you can use crayons or markers to color in your silhouette drawing.
Step 7:
Proudly show off your artistic talent!
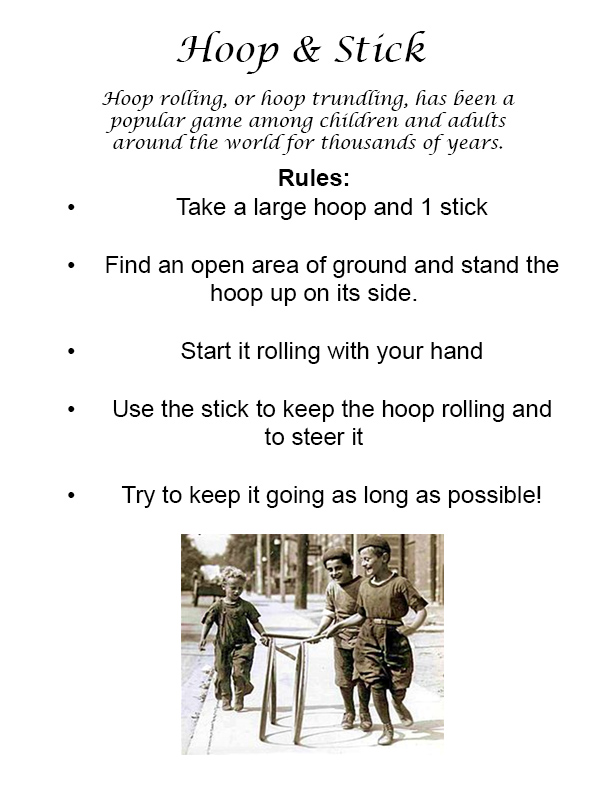
Hoop rolling, or hoop trundling, has been a popular game among children and adults around the world for thousands of years.
Rules
- Take a large hoop and 1 stick.
- Find an open area of ground and stand the hoop up on its side.
- Start it rolling with your hand.
- Use the stick to keep the hoop rolling and to steer it.
- Try to keep it going as long as possible!
A tossing game with small hoops and sticks
Rules:
- Find at least 1 other person to play with and take 2 sticks for each person.
- Partner 1 – Put the small hoop over both of your sticks, so that the sticks are inside the hoop forming an “X”.
- Stand a short distance away from your partner and toss the hoop to your partner by pulling the sticks apart quickly.
- Partner 2 – Catch the hoop with your sticks. Then toss the hoop back (see previous steps).
- This can be done with more than 2 people. Simply form a circle and toss the hoop randomly around to other people.
- If there are not enough sticks, you can use only 1 stick.

A popular nineteenth century game that is still popular today at fairs and carnivals.
Rules:
- Grab a couple of straw rings.
- Stand a short distance from the ring toss board.
- Try to throw the rings onto the pegs!
- Keep moving farther back for a greater challenge.
- Score yourself as you go: 10 points for the center peg and 5 for each of the corner pegs.

Mount Clare Museum in Baltimore, Maryland has a great resource to create your own Colonial whirligig toy.
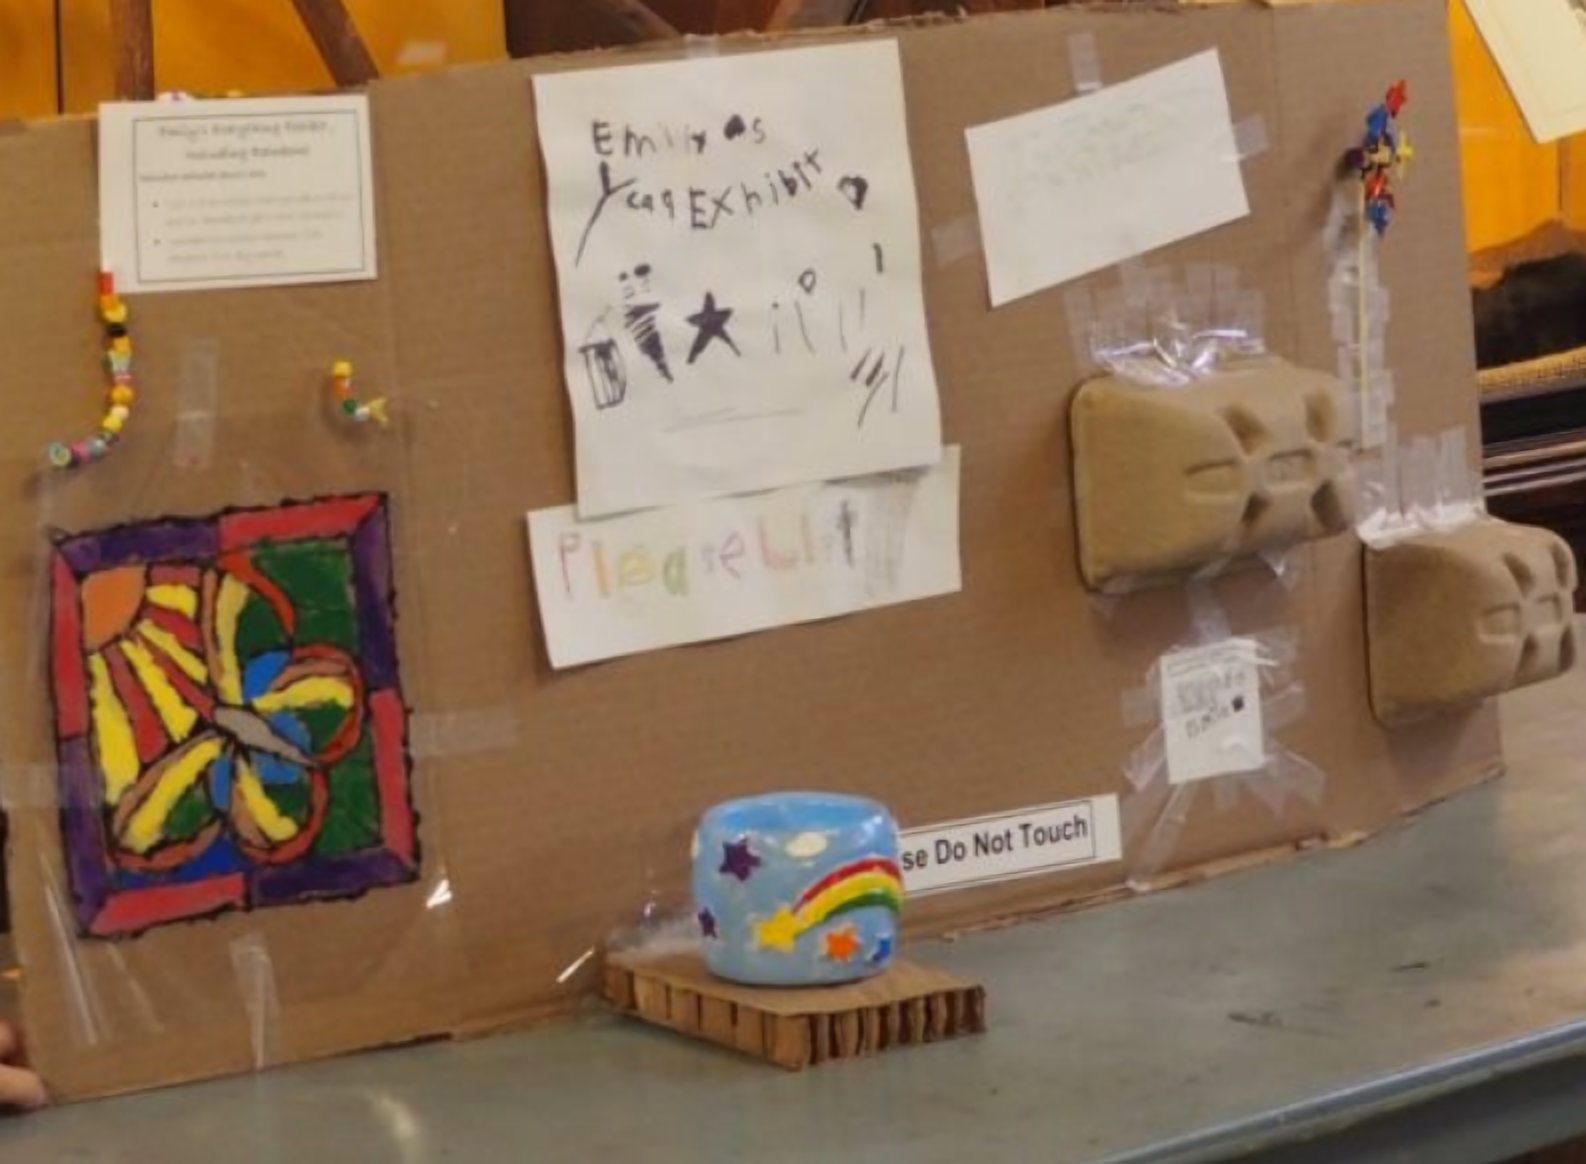
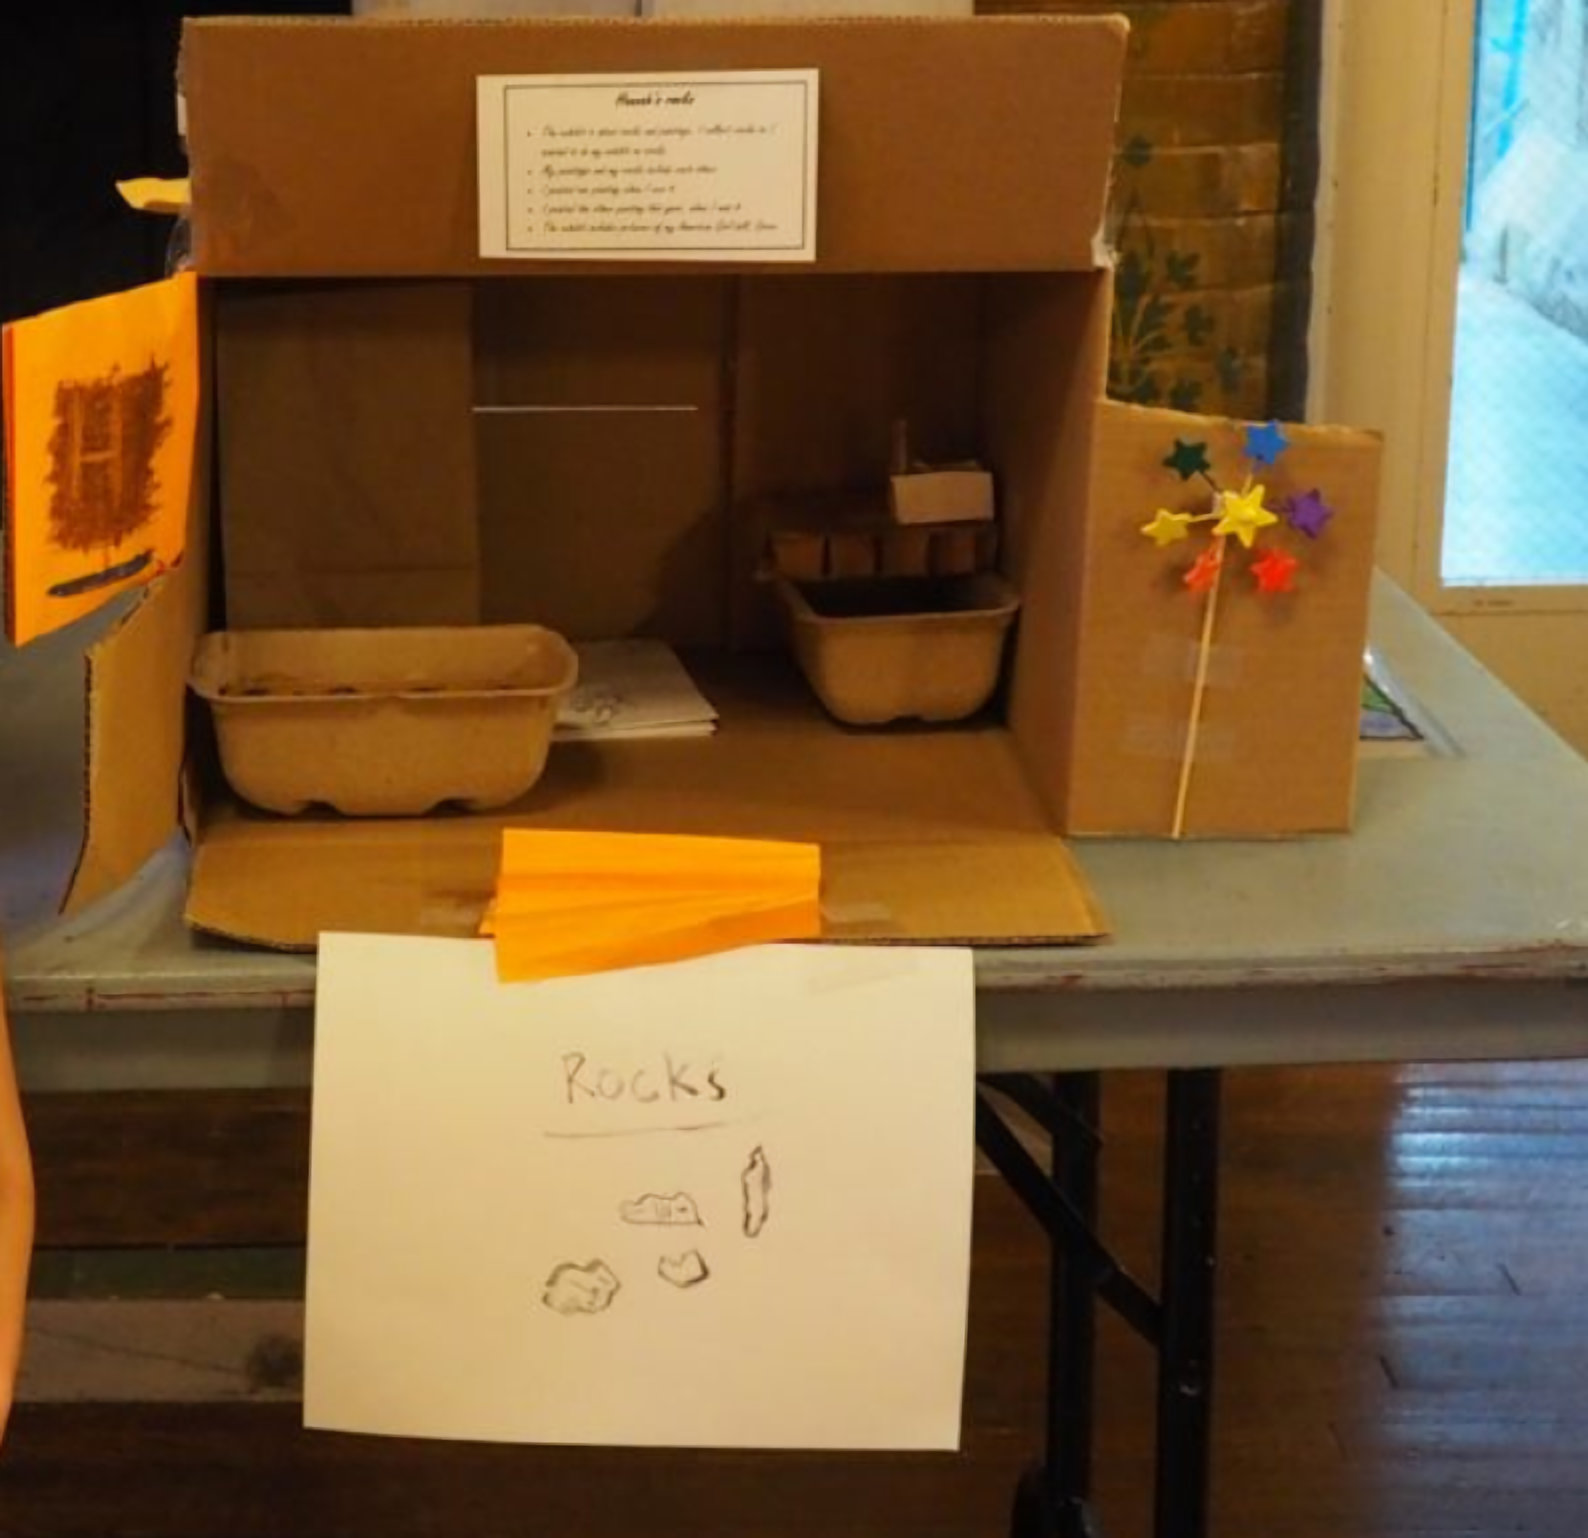
Design your own exhibit with METC’s Junior Curator Activity!


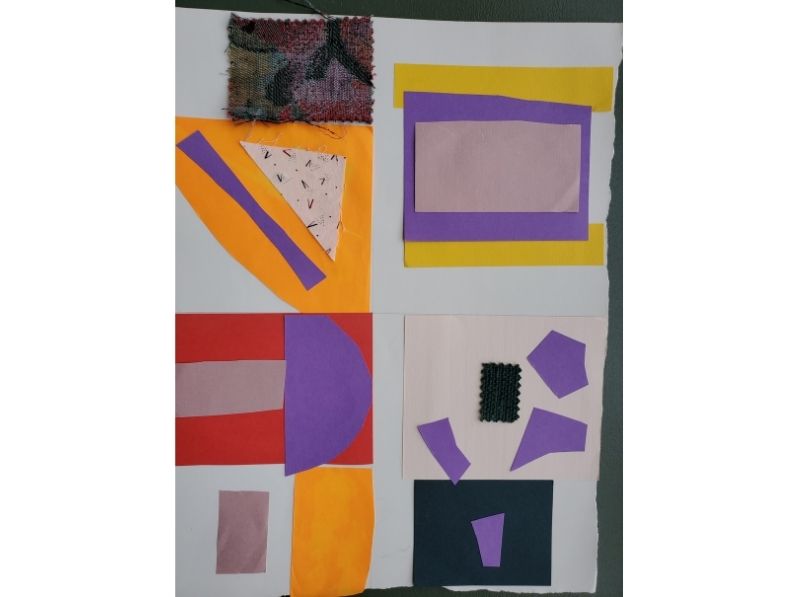
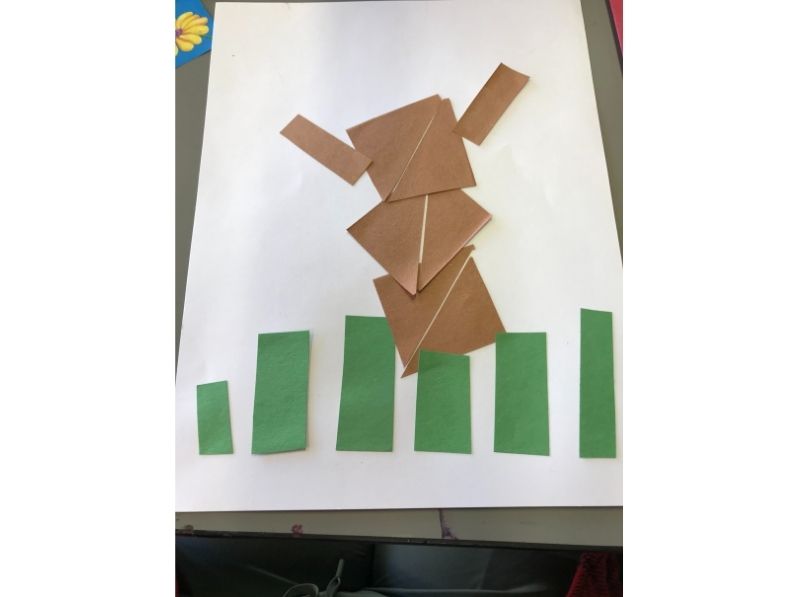
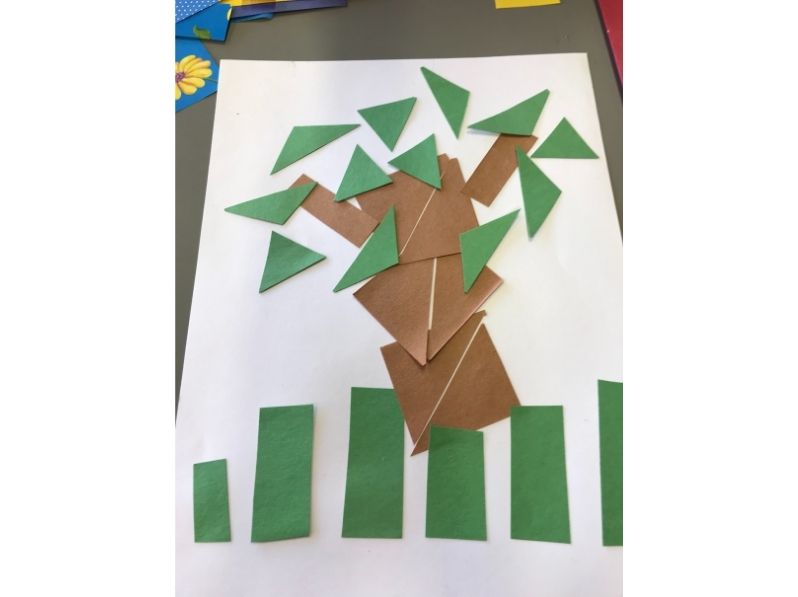
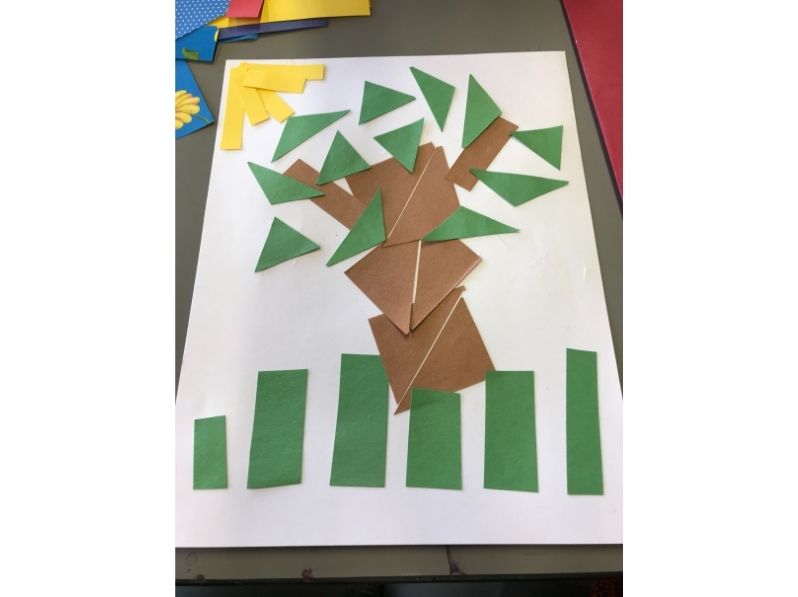
People, both a long time ago and today, make quilts to keep themselves and their family warm, but also as works of art! Here are two of the beautiful quilts in METC’s collection.

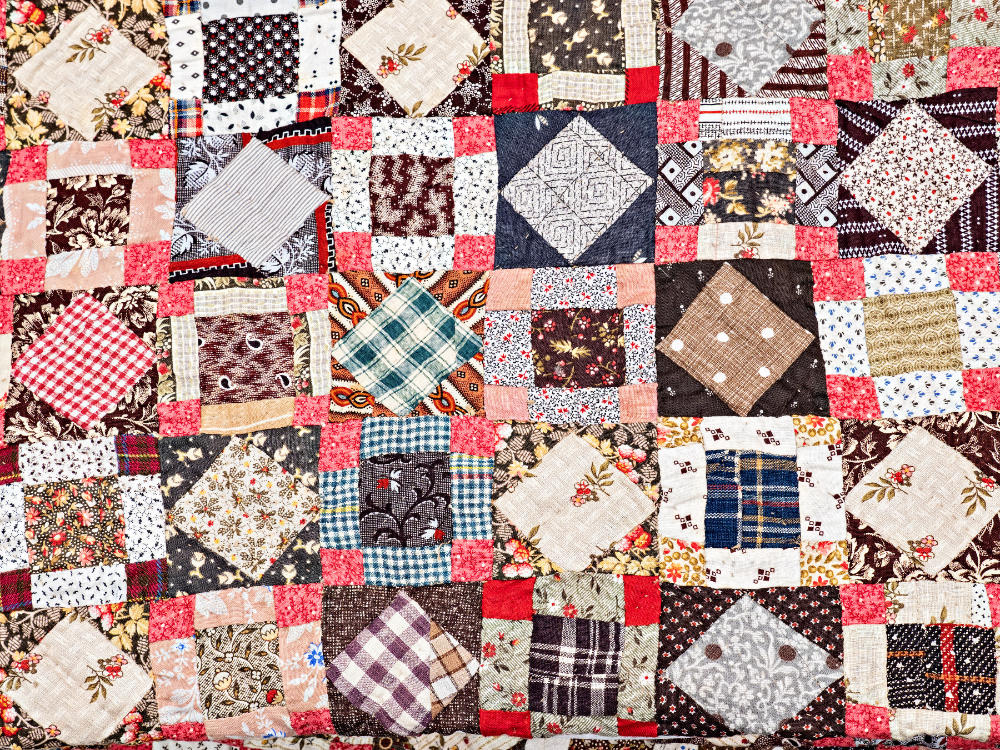
What do you notice about these quilts? Do you like one quilt more than the other?
Quilts are made by sewing piece of fabric together to make a pattern, design or picture. Notice how the 1st one has many small triangles and squares making up bigger squares. In contrast, the 2nd one use tiny triangles and other shapes to make the pattern of a tree – see the close-up image.

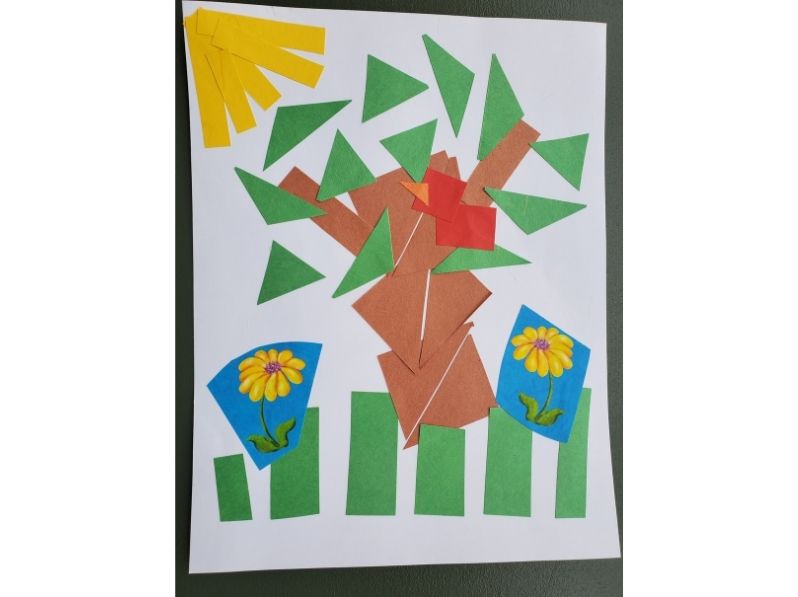
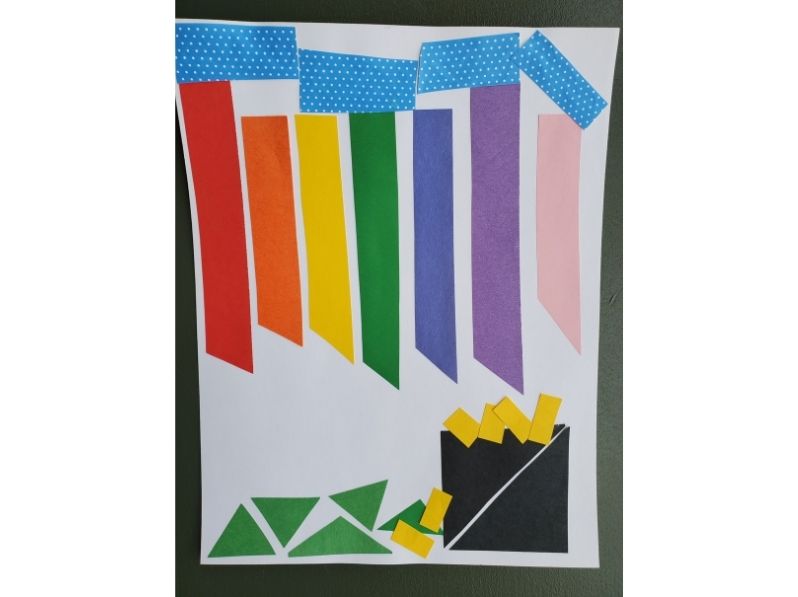
You can do the same thing with scraps of paper. Instead of sewing the pieces together you will be gluing, but the finished effect will be similar. It’s a lot like making a collage. Your finished “quilt” might look something like one of these.
The supplies you will need for this craft:
- Paper as your base – cardstock or posterboard are best if you have them, but any style, size or type is fine.
- Paper scraps or paper you can cut up. Wrapping paper can work well for this to give you some patterns. You can also use fabric scraps if you have them
- Glue stick or glue
- Pencil
Step One: Design your quilt
Decide what you want your “quilt” to look like. Do you want a pattern? A picture? A random design? An explosion of color?
Think about what size/shape/color of paper pieces you will need to achieve the effect. *Remember, you are making a picture or design with your paper scraps*
*Tip* As you plan your design, keep in mind that you can put pieces of paper on top of each other to create layers and other interesting effects.
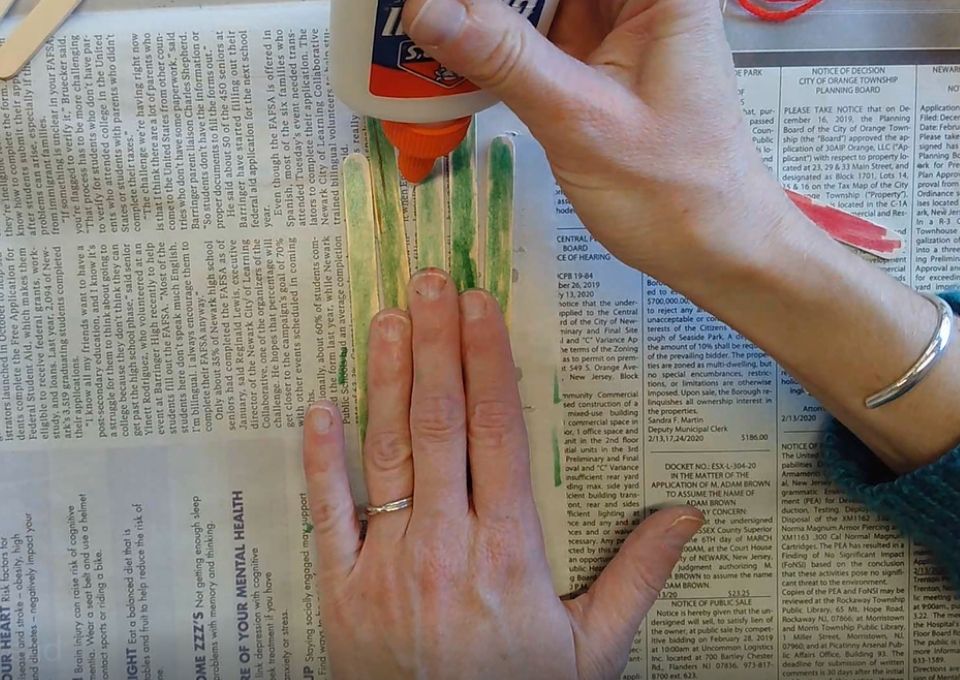
Step Two: Make your quilt
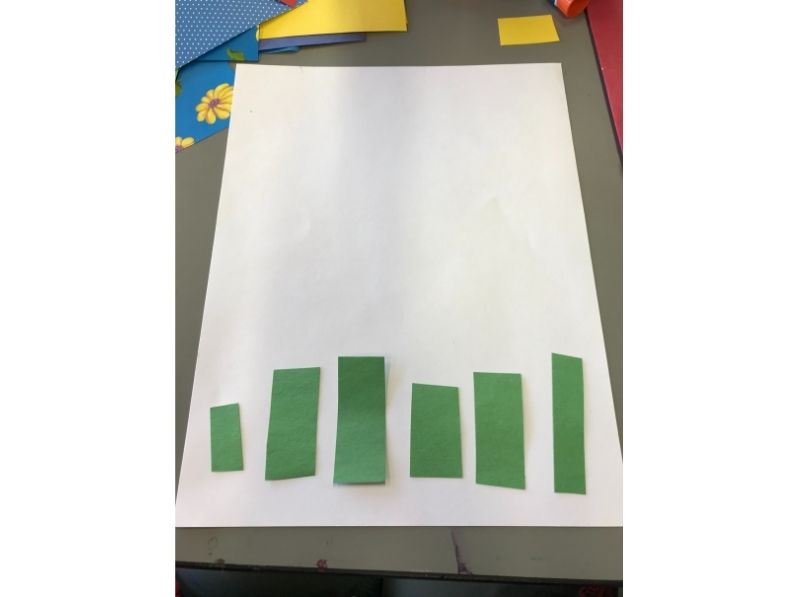
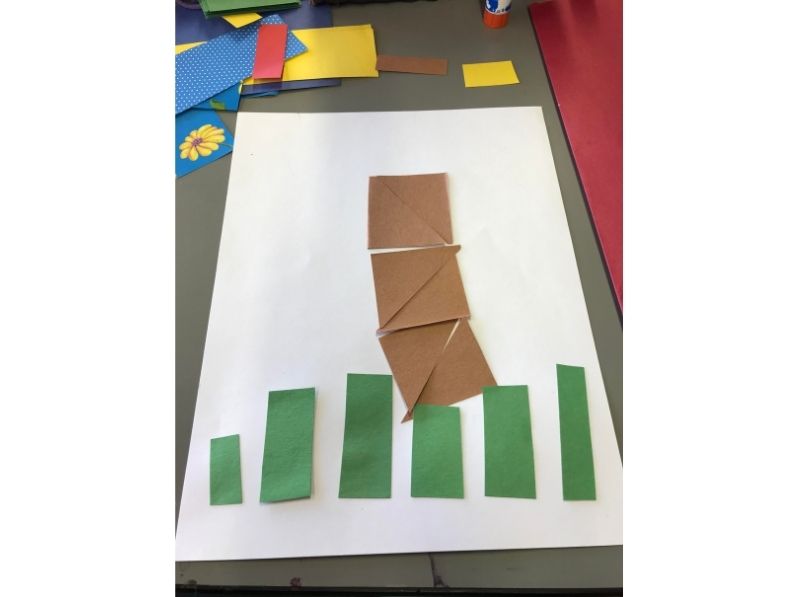
Before you use any glue, lay out your paper scraps the way you want them. You may need to move them around a little until you have them just right. Once you know exactly how you want to place your paper pieces, glue them in place. The best way to do this is to glue one piece at a time, leaving all the others in place. If you have pieces on top of each, you can either glue the bottom ones onto your base first, then glue the ones on top OR start by gluing the top piece onto the piece that will be underneath, then glue the entire thing onto your base.
The images below show the step-by-step making of one of the samples above to give you an idea for how you might build your quilt and make a picture with your paper scraps.

Step Three: Share images of your finished quilt with METC!
Have you ever wanted to invent something to make a day to day task easier? Now is your chance! Our “Invention Activity” will help guide you in creating your own invention!
Once upon a time you found METC at Home… Create your own fairy tale and find your happily ever after!
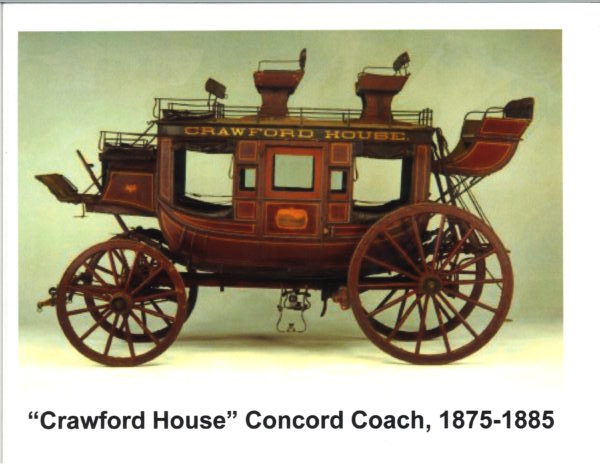
While we can’t take a road trip in real life, let’s take road trip through history and explore how people who came before us used transportation! Design a carriage and go on a carriage journey with us!
Design Your Own Carriage!
- Print Out Carriage Body Template.
- Print Out Design Your Own Carriage Sheet. If you have the ability to print legal-sized, this one will give you more room for creativity, but either works fine.
- Glue the carriage body into place behind your horse. See the Carriage Craft Sample for direction and positioning & see the Carriage Image to see what this style of carriage looks like in real life.
- Draw wheels under the carriage body
- Add reins (to connect the driver to the horse and to let them steer the horse). If you have pipe cleaners or yarn, glue these in place as reins (see the sample). Otherwise, draw them in.
- Put people in your carriage (Remember, someone has to be driving!)
- Color your horse & carriage
- You can glue on little gems or buttons or any other small objects for extra decoration
- Create the landscape around your carriage
- Consider gluing cotton balls into the sky for clouds
For an extra challenge, try to make a 3-D version. Use the Horse Template, Carriage Body Template and Wheel Templates to get you started. Print out the horse and carriage body on cardstock if possible (you may even want to print 2 horses & glue them together for extra support). For best results, try tracing the wheels onto cardboard and cutting those out.
Be creative! How could you give this enough strength and support to make it stand up? Can you make one that actually moves? Some materials to consider using: pipe cleaners, corks, thin cardboard tubes
Go on a Carriage Journey!
After you design your own carriage, try out this game to see what it might have been like to go on a journey in your carriage.
- Print Out My Journey Sheet
- Print Out Challenge 1 and Challenge 2 and What Will You See 1, What Will You See 2, and What Will You See 3 sheets.
- Cut Out the cards, shuffled them and put them face down in a pile.
- Pick a destination for your journey (where you will end up). And feel free to change the starting location to something other than Madison!
- Pick a card. This is the 1st thing you encounter on your journey. It could be a challenge (something bad) or simply something you see along the way. Use colored pencils, markers, crayons or anything else to draw this on your journey. Don’t forget to draw your carriage encountering this element!
- Continuing picking cards and drawing the elements they show until you reach your destination.
- Add any other background or decoration that you want for your journey
- Do it again for another trip!
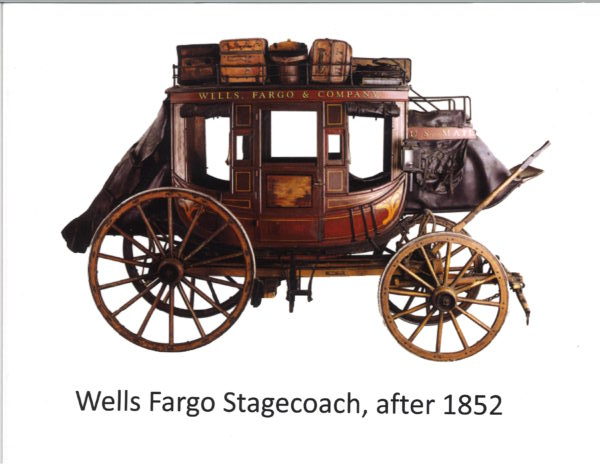
See the Stagecoach & Concord Coach images to see types of carriages common used for long distance travel.
METC DIY Greenhouse
Get ready for spring by growing some plants in a homemade greenhouse! Follow METC intern Christina Sebak as she takes you through the entire process.
PHASE ONE
You will need the following materials:
- Clear plastic cups (1 cup per seed) or cupcake container
- Soil/Dirt
- Seeds
- Thumbtack (to poke a few holes in the top of the plastic)
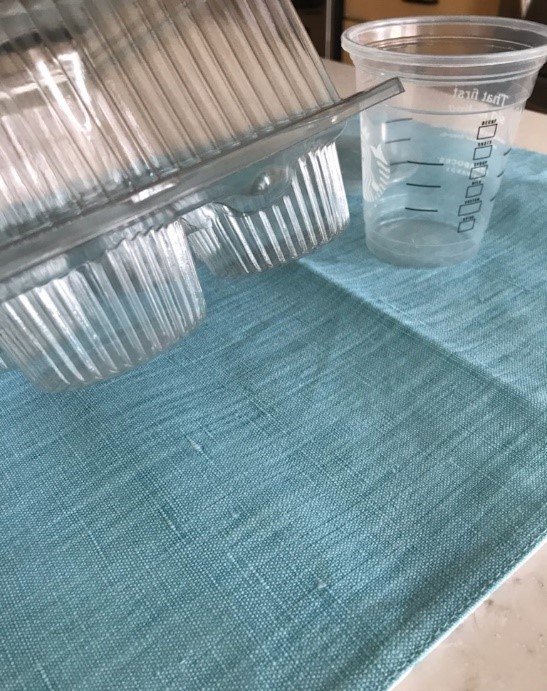
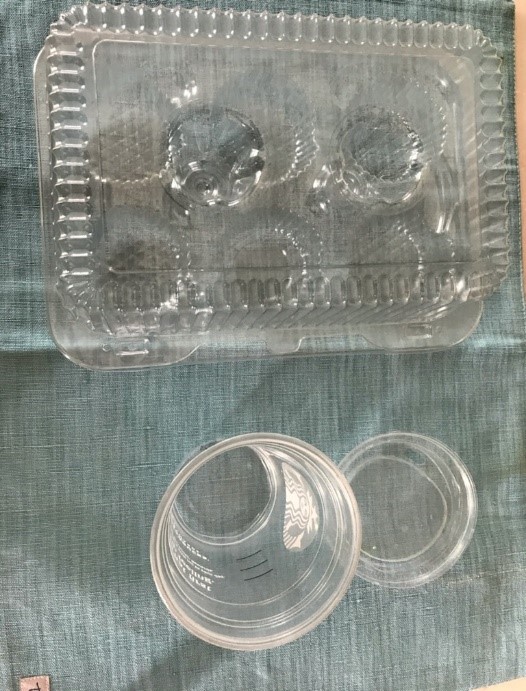
Make sure you have a clean plastic container. I am turning my cupcake container upside down to give the sprouts room to grow. This clean plastic cup is a recycled take-out cup with a lid that already has a hole in it!
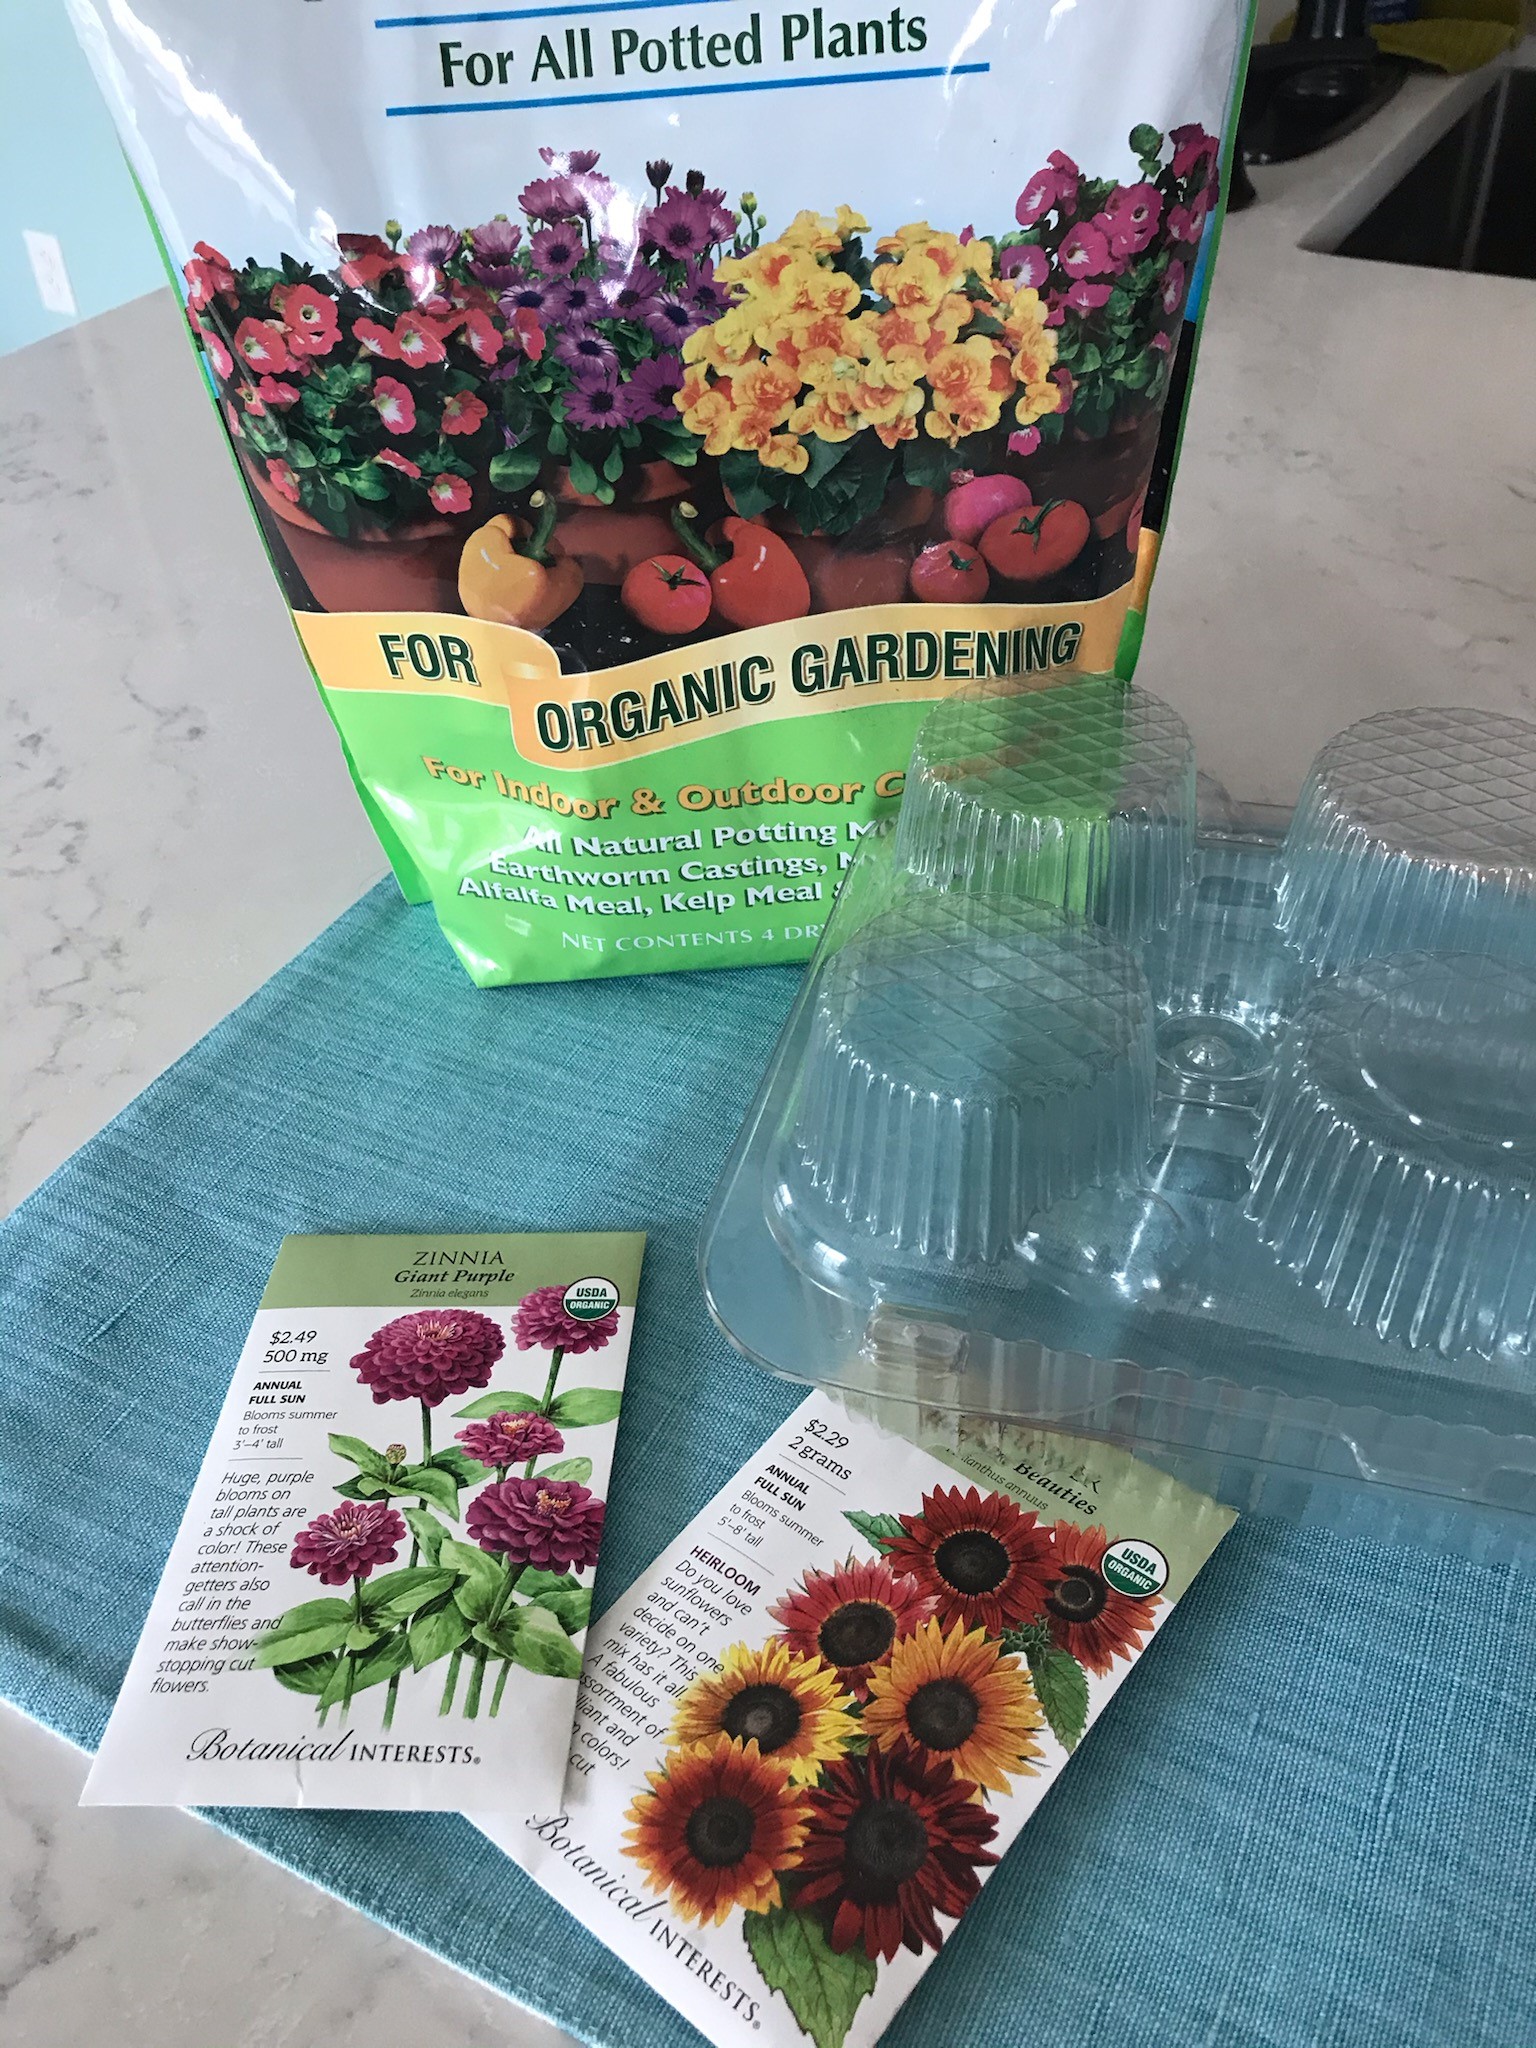
You will also need some potting soil and your choice of seeds! I chose sunflowers and zinnias but you can choose anything you want including fruit or vegetable seeds!

Have an adult help you use a thumbtack to poke a hole in the top of the plastic container, plants need air to breathe and grow, just like we do! Your plastic container will need some small hole at the top.
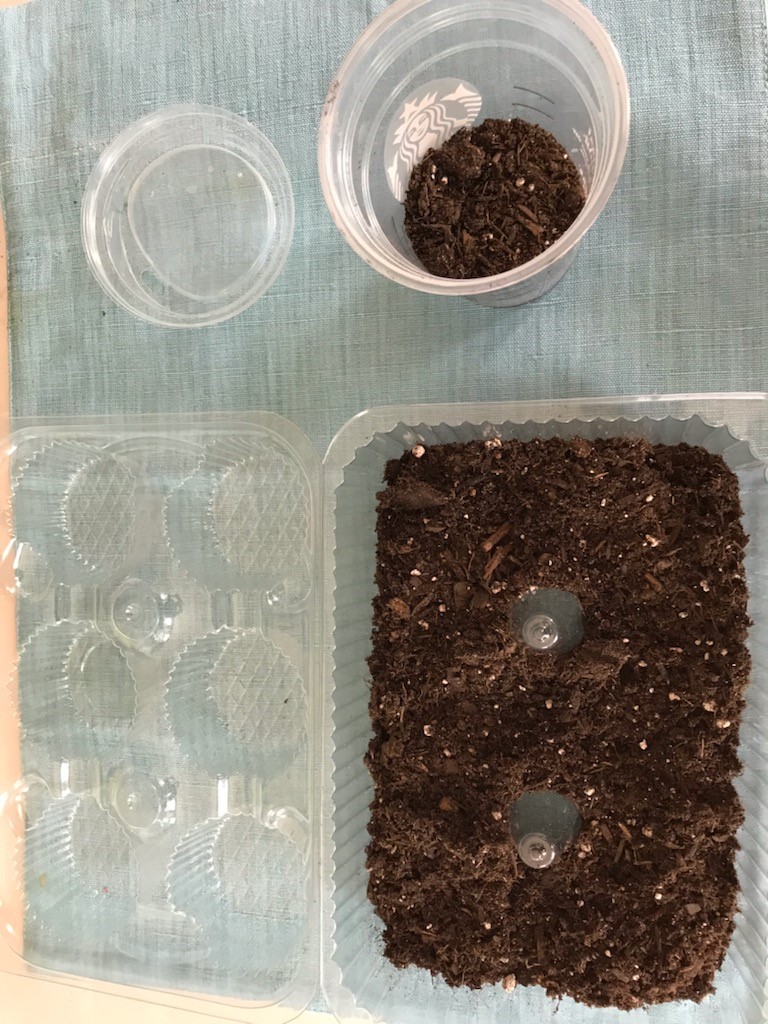
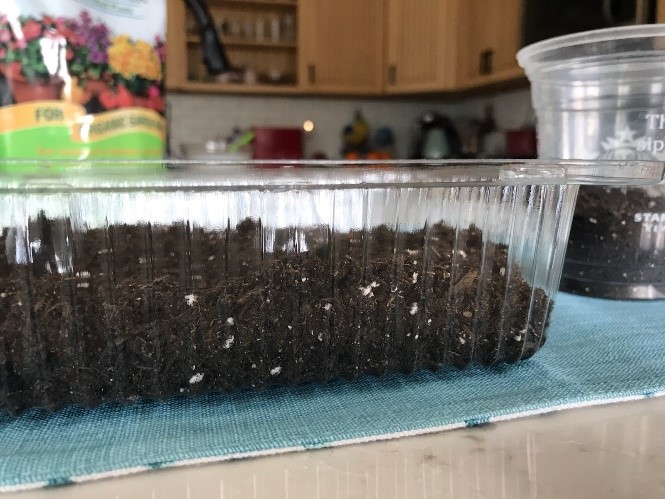
Fill your plastic container a little bit less than halfway: this will give the seeds room to grow.

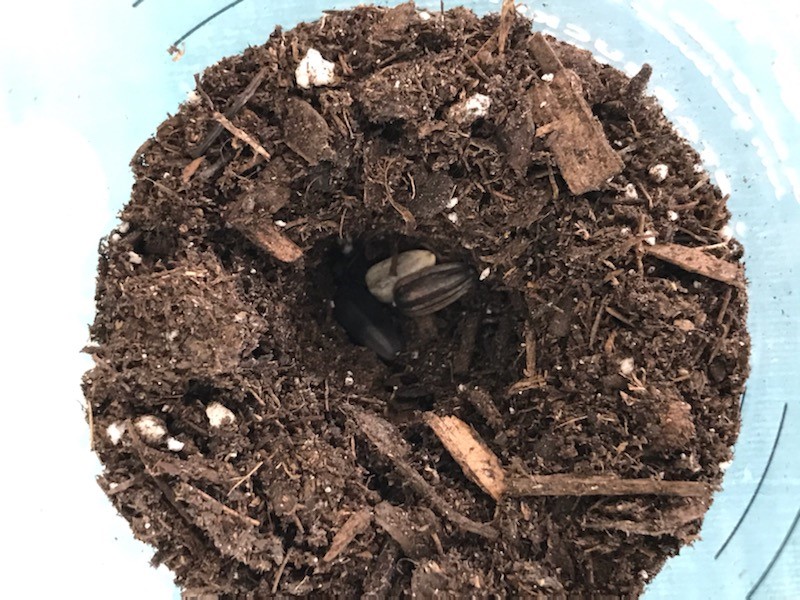

Select 3 seeds per hole and place them in a little hole in the soil. You can use your finger to make the hole, but don’t go all the way down to the plastic bottom though – your seeds need some room for their roots to grow! Gently cover the seeds with dirt, and add small amounts of water to the soil until it is damp, not wet. Seeds don’t like to sit in water, but the soil needs to be a little damp.
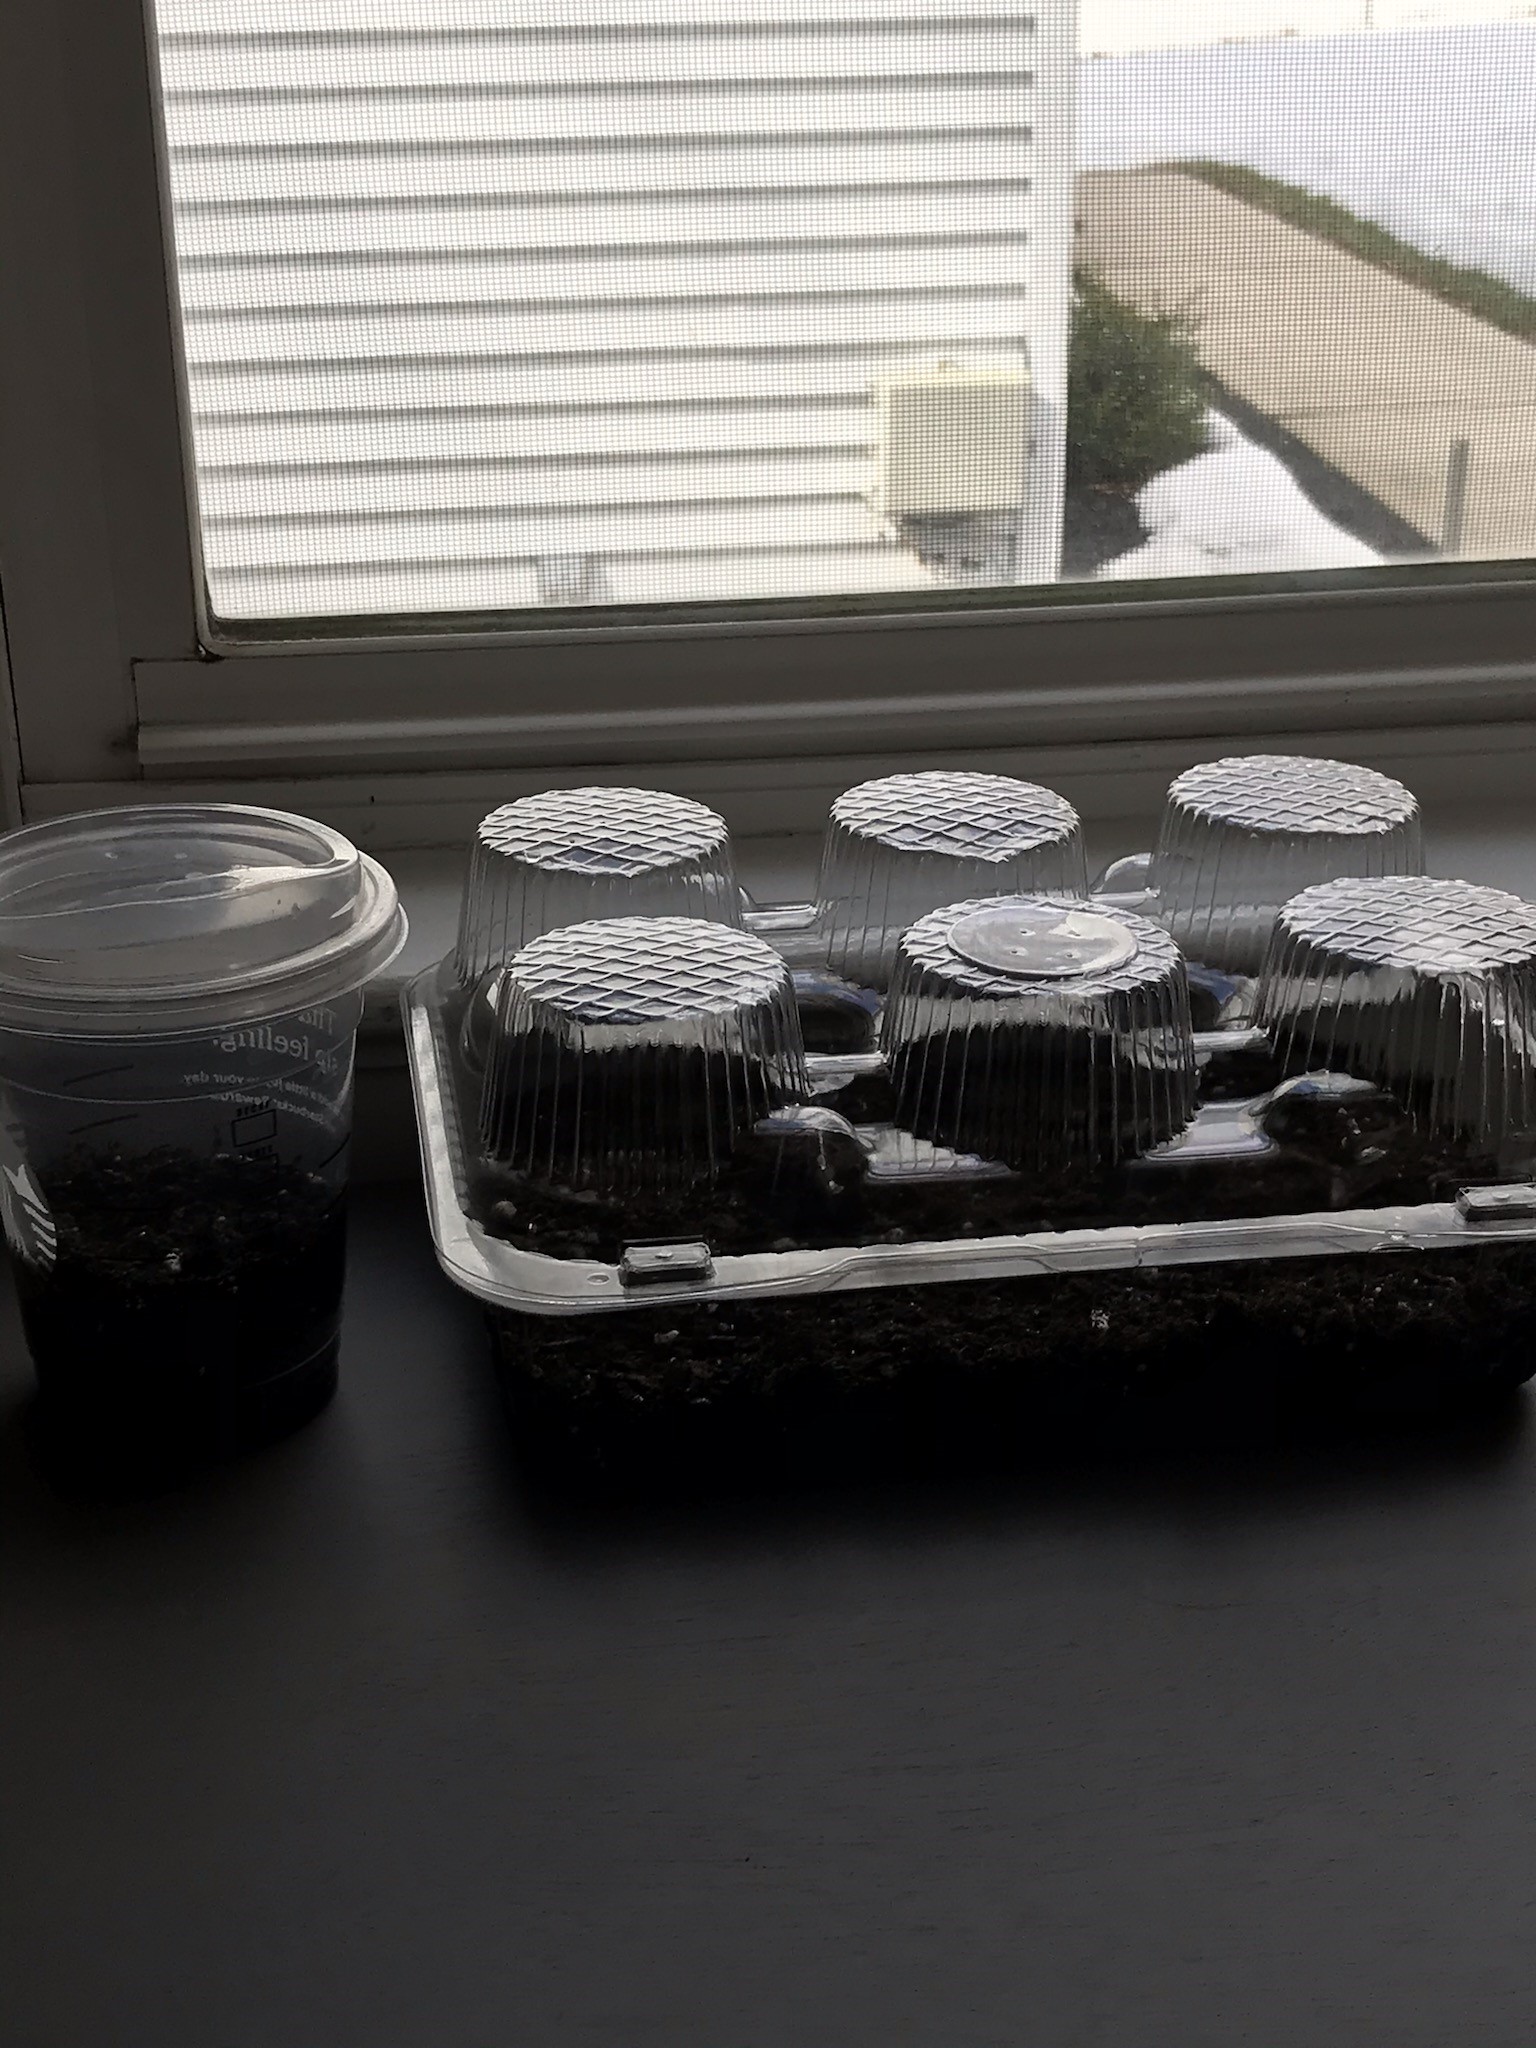
Place the containers on a windowsill, so the seeds get some sunshine. With a closed container, you won’t need to water the seedlings every day. The sunlight causes the water in the soil to evaporate, BUT because it is closed, the water droplets collect on the inside of the cover and when the droplets get too heavy…. They fall like rain!! You created your own little ecosystem in the closed plastic container! Keep an eye on the moisture level of the dirt, if it seems dry you can add a drop of water, but you should not need to water it every day.
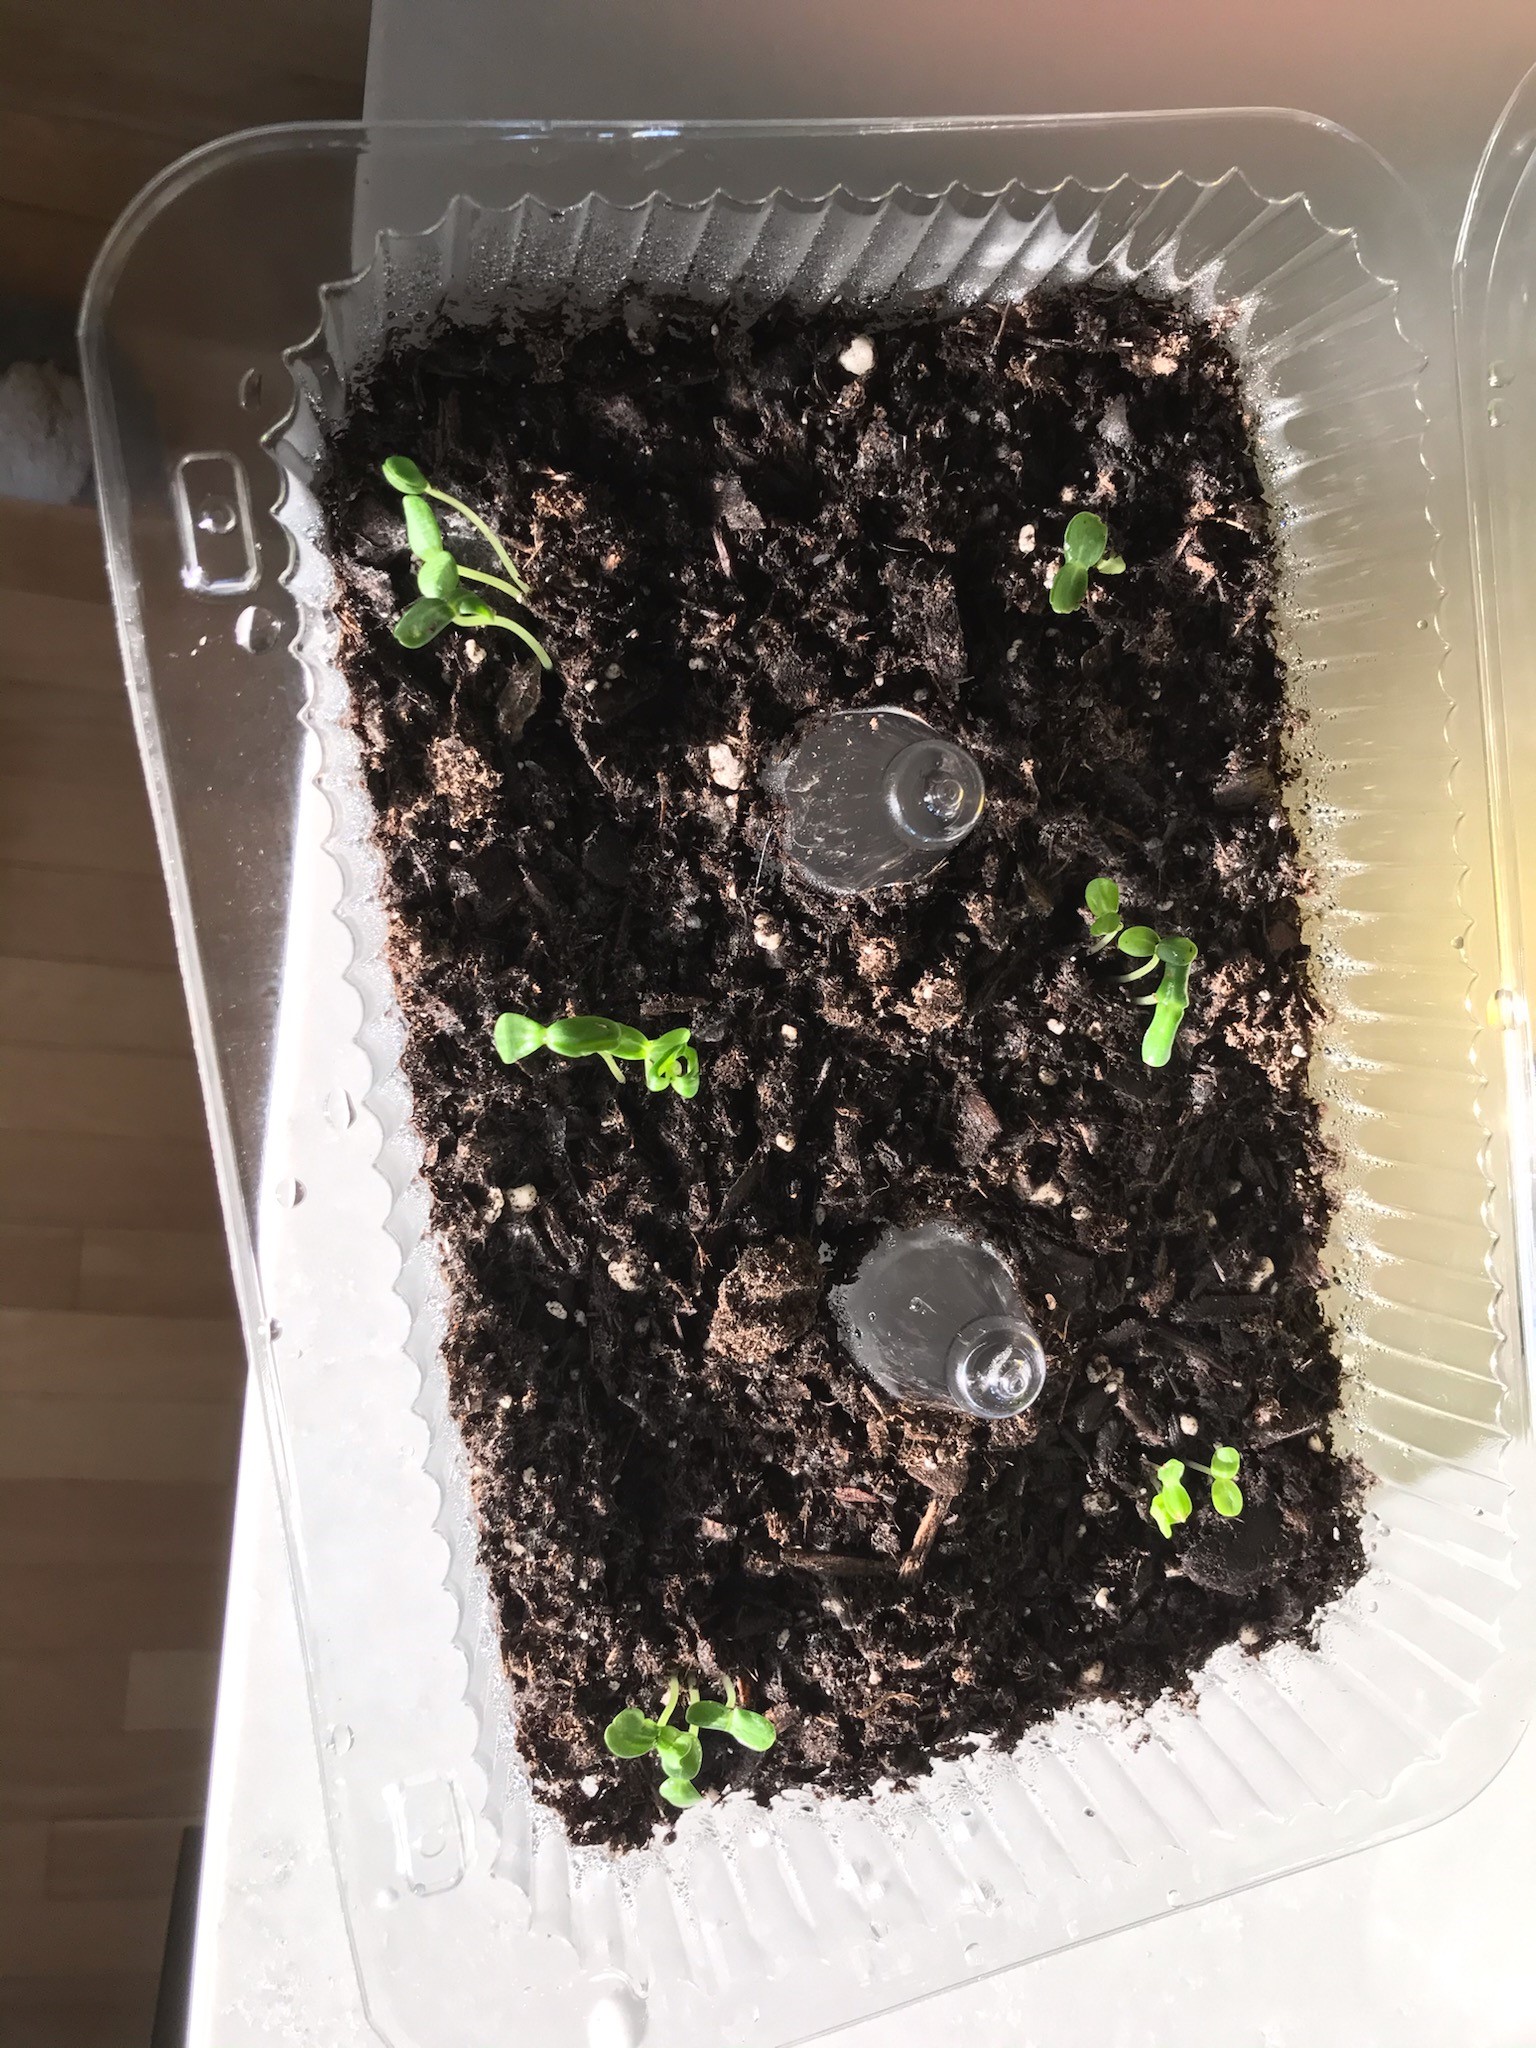
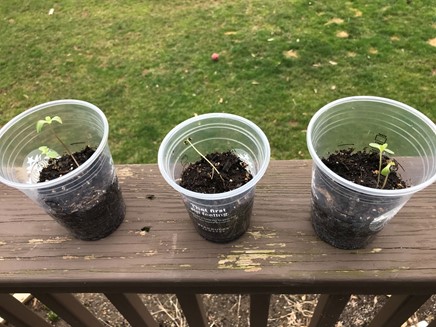
These are the seedlings after just one week! The seeds in the single cup are sunflower seeds and the seedlings are almost too tall for the cup. Pretty soon it will be time to transplant the sprouts into bigger containers to keep growing. The initial cup was a 12oz (small) iced drink cup.
Check back soon for the next phase!

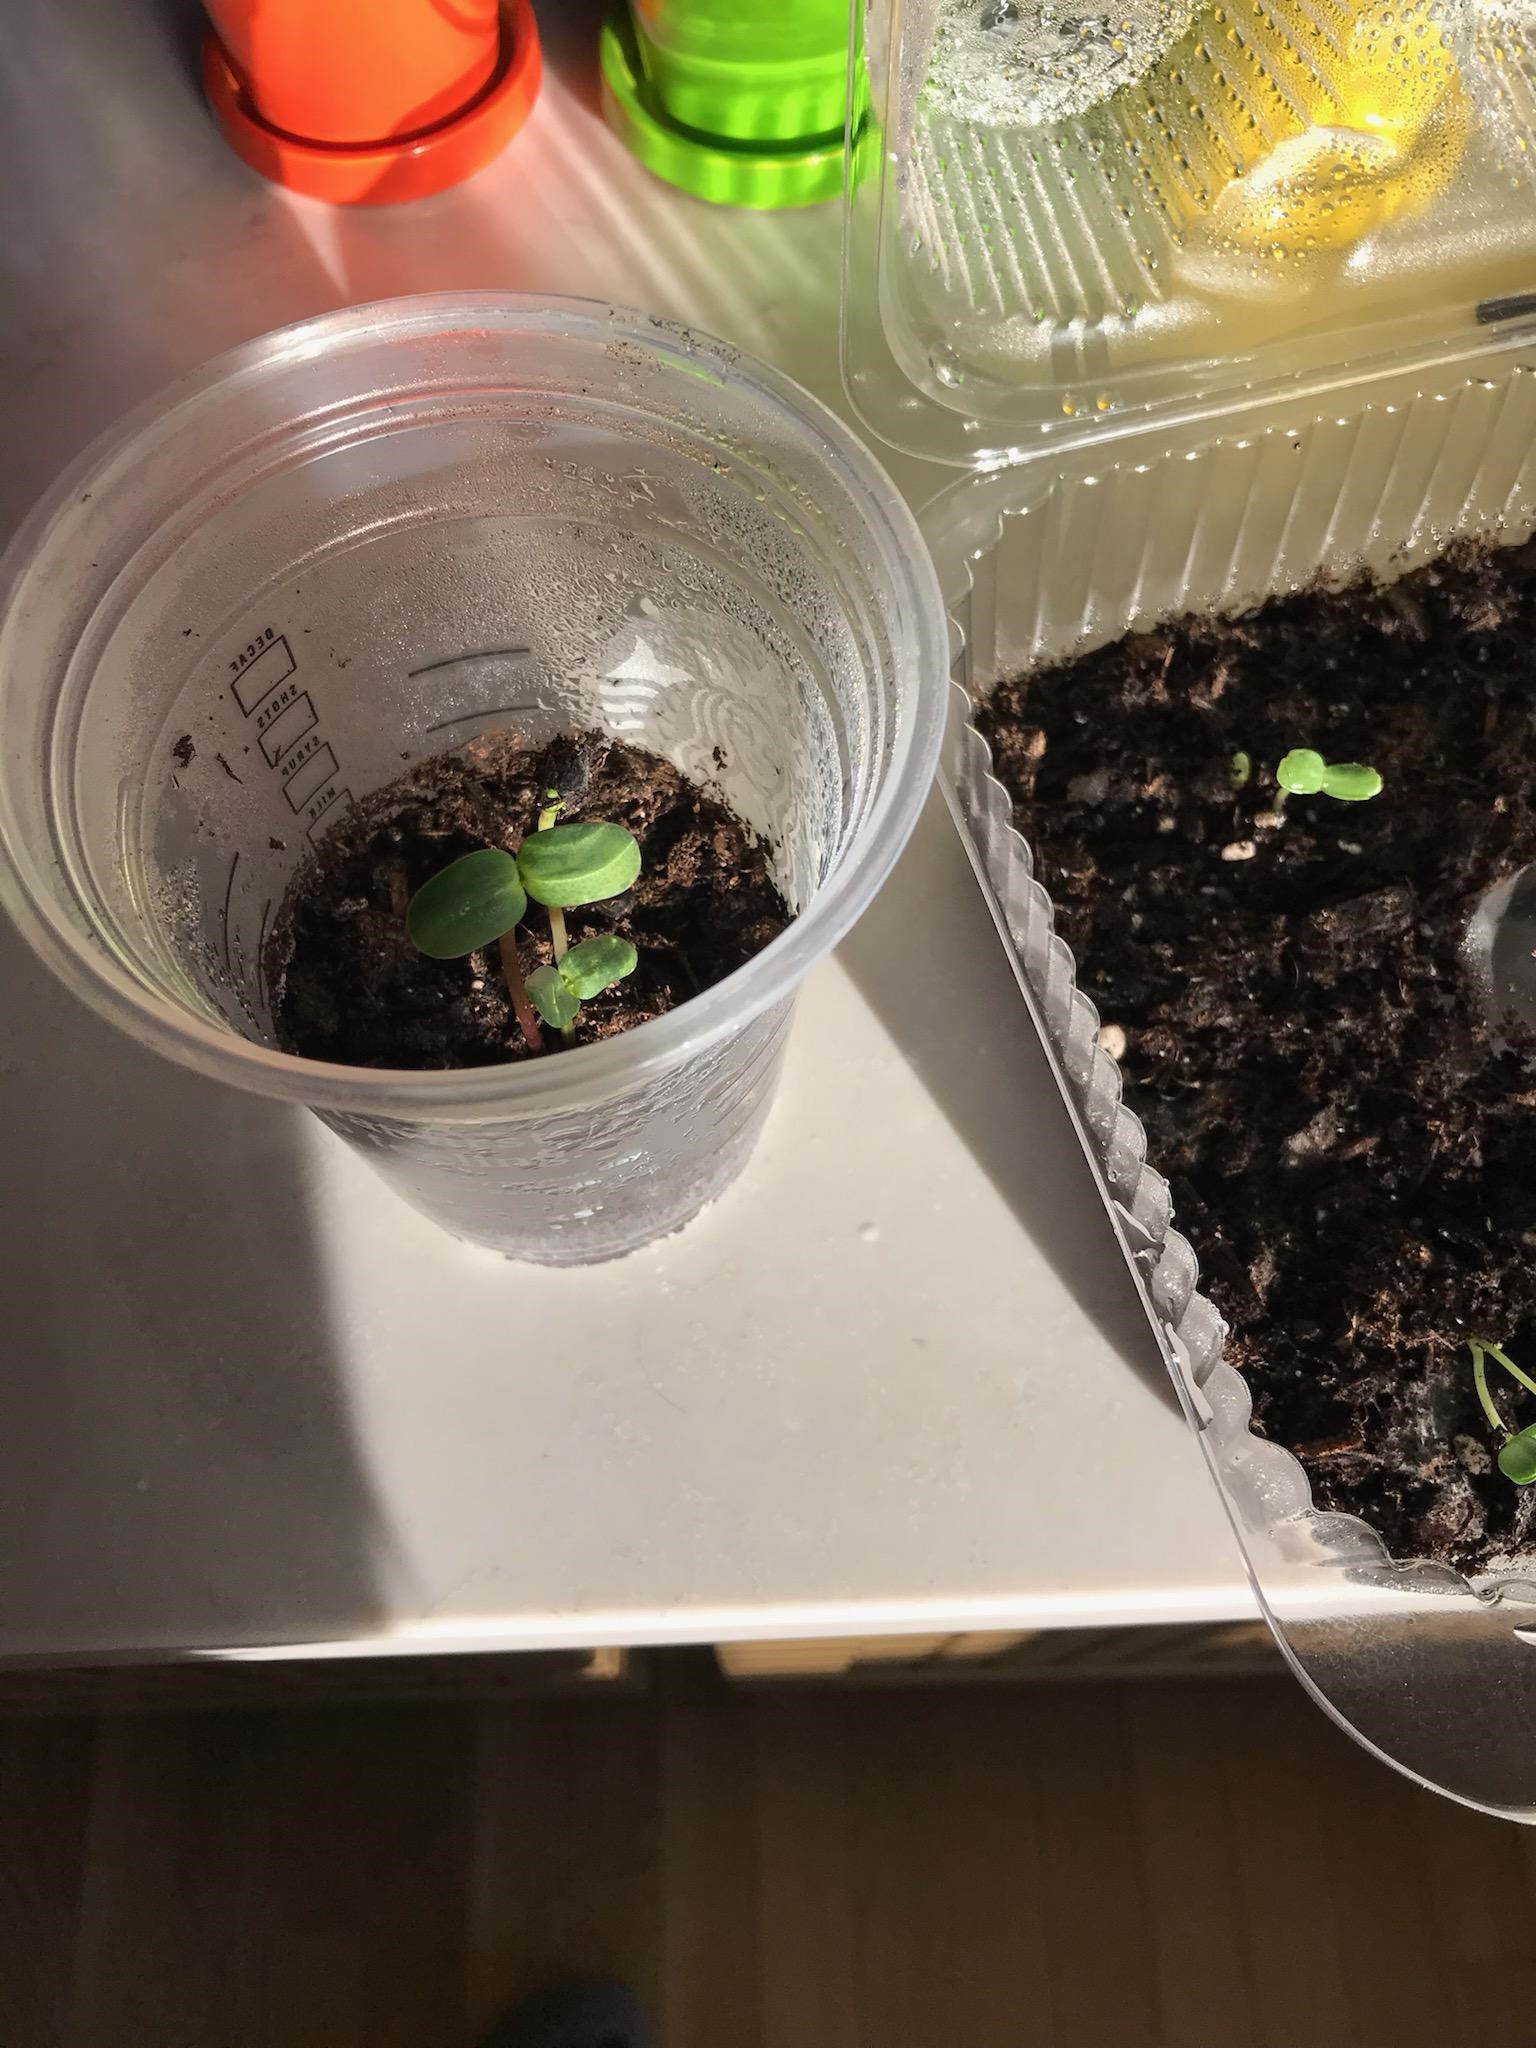
As the seedlings get too big for their initial containers, they need to be moved and replanted into taller cups and individual planting containers so they can get big and strong before they are ready to be planted outside when it is warmer.
My sunflower seeds are growing so fast! I had to transplant them to a small potting container. This container does not have a lid so I will need to check the soil moisture every day and water it a tiny bit so the soil stays damp. The other seedlings are in 16 oz iced beverage containers, with lids so I won’t need to water them as often.
Here are updated pictures of my seedlings/sprouts:
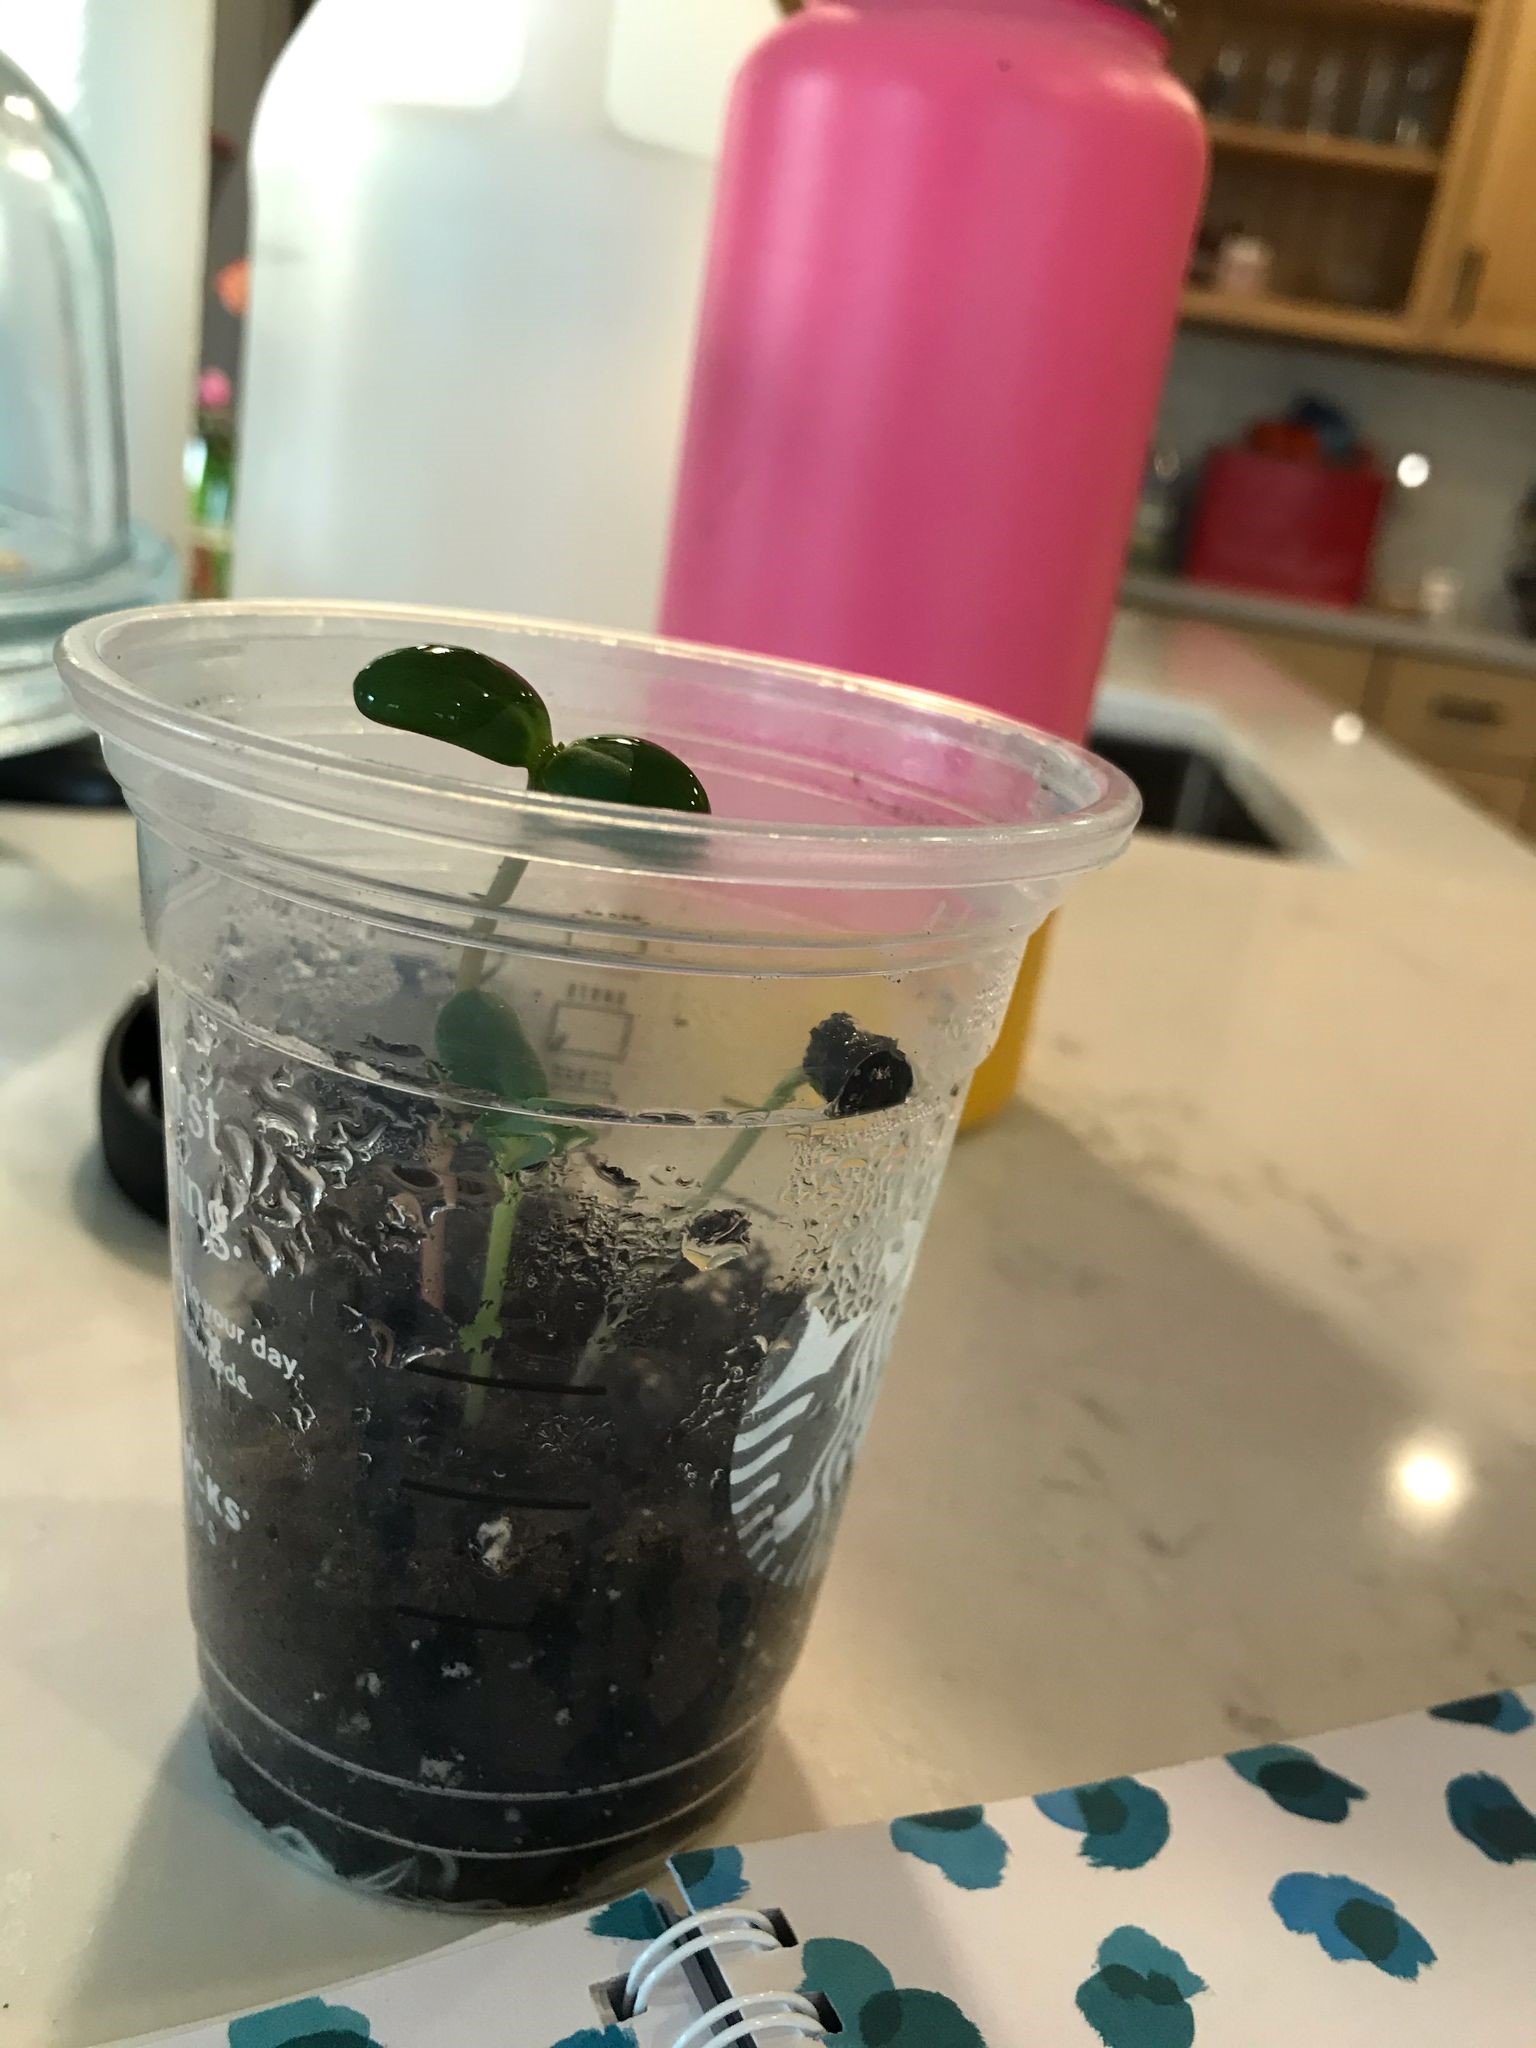
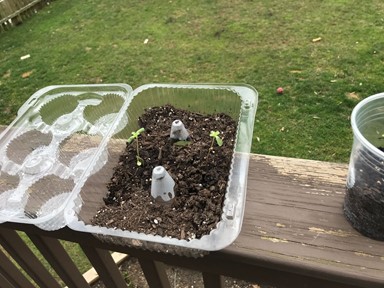
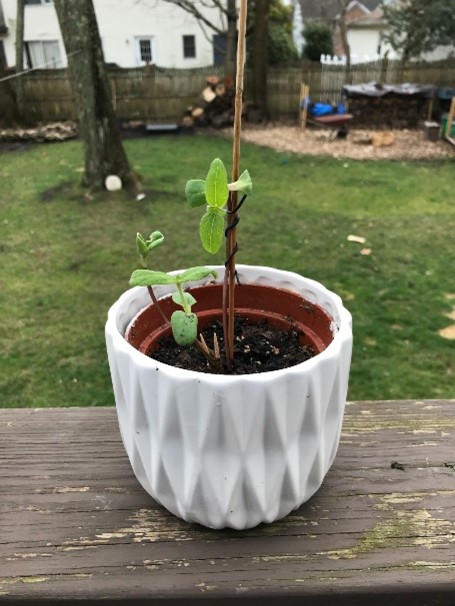
Some are doing really well, and some are struggling, but it is okay! Make sure the sprouts have damp soil and as much sunlight as possibly. You might find that you need to use a wooden stick to keep your growing sprouts straight: If so, you can use a twisty tie to gently attach your sprout to the stick for support.
The two on either end are doing okay! The one in the middle seems to be struggling. Don’t give up on it, but it’s ok if not all your plants make it.

My sprouts need some additional support so I used a wooden skewer and a twisty tie to gently support the tall sprout.
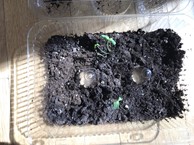
These little guys are still growing in the original container, they are looking strong, but they are not too tall for the container yet so I will let them keep growing until I have to move them.
Here are links to a few ideas for recycled art projects you can do to celebrate Earth Day, or year round! We tried out the first one – try out as many as you want and send us photos of your finished masterpieces!
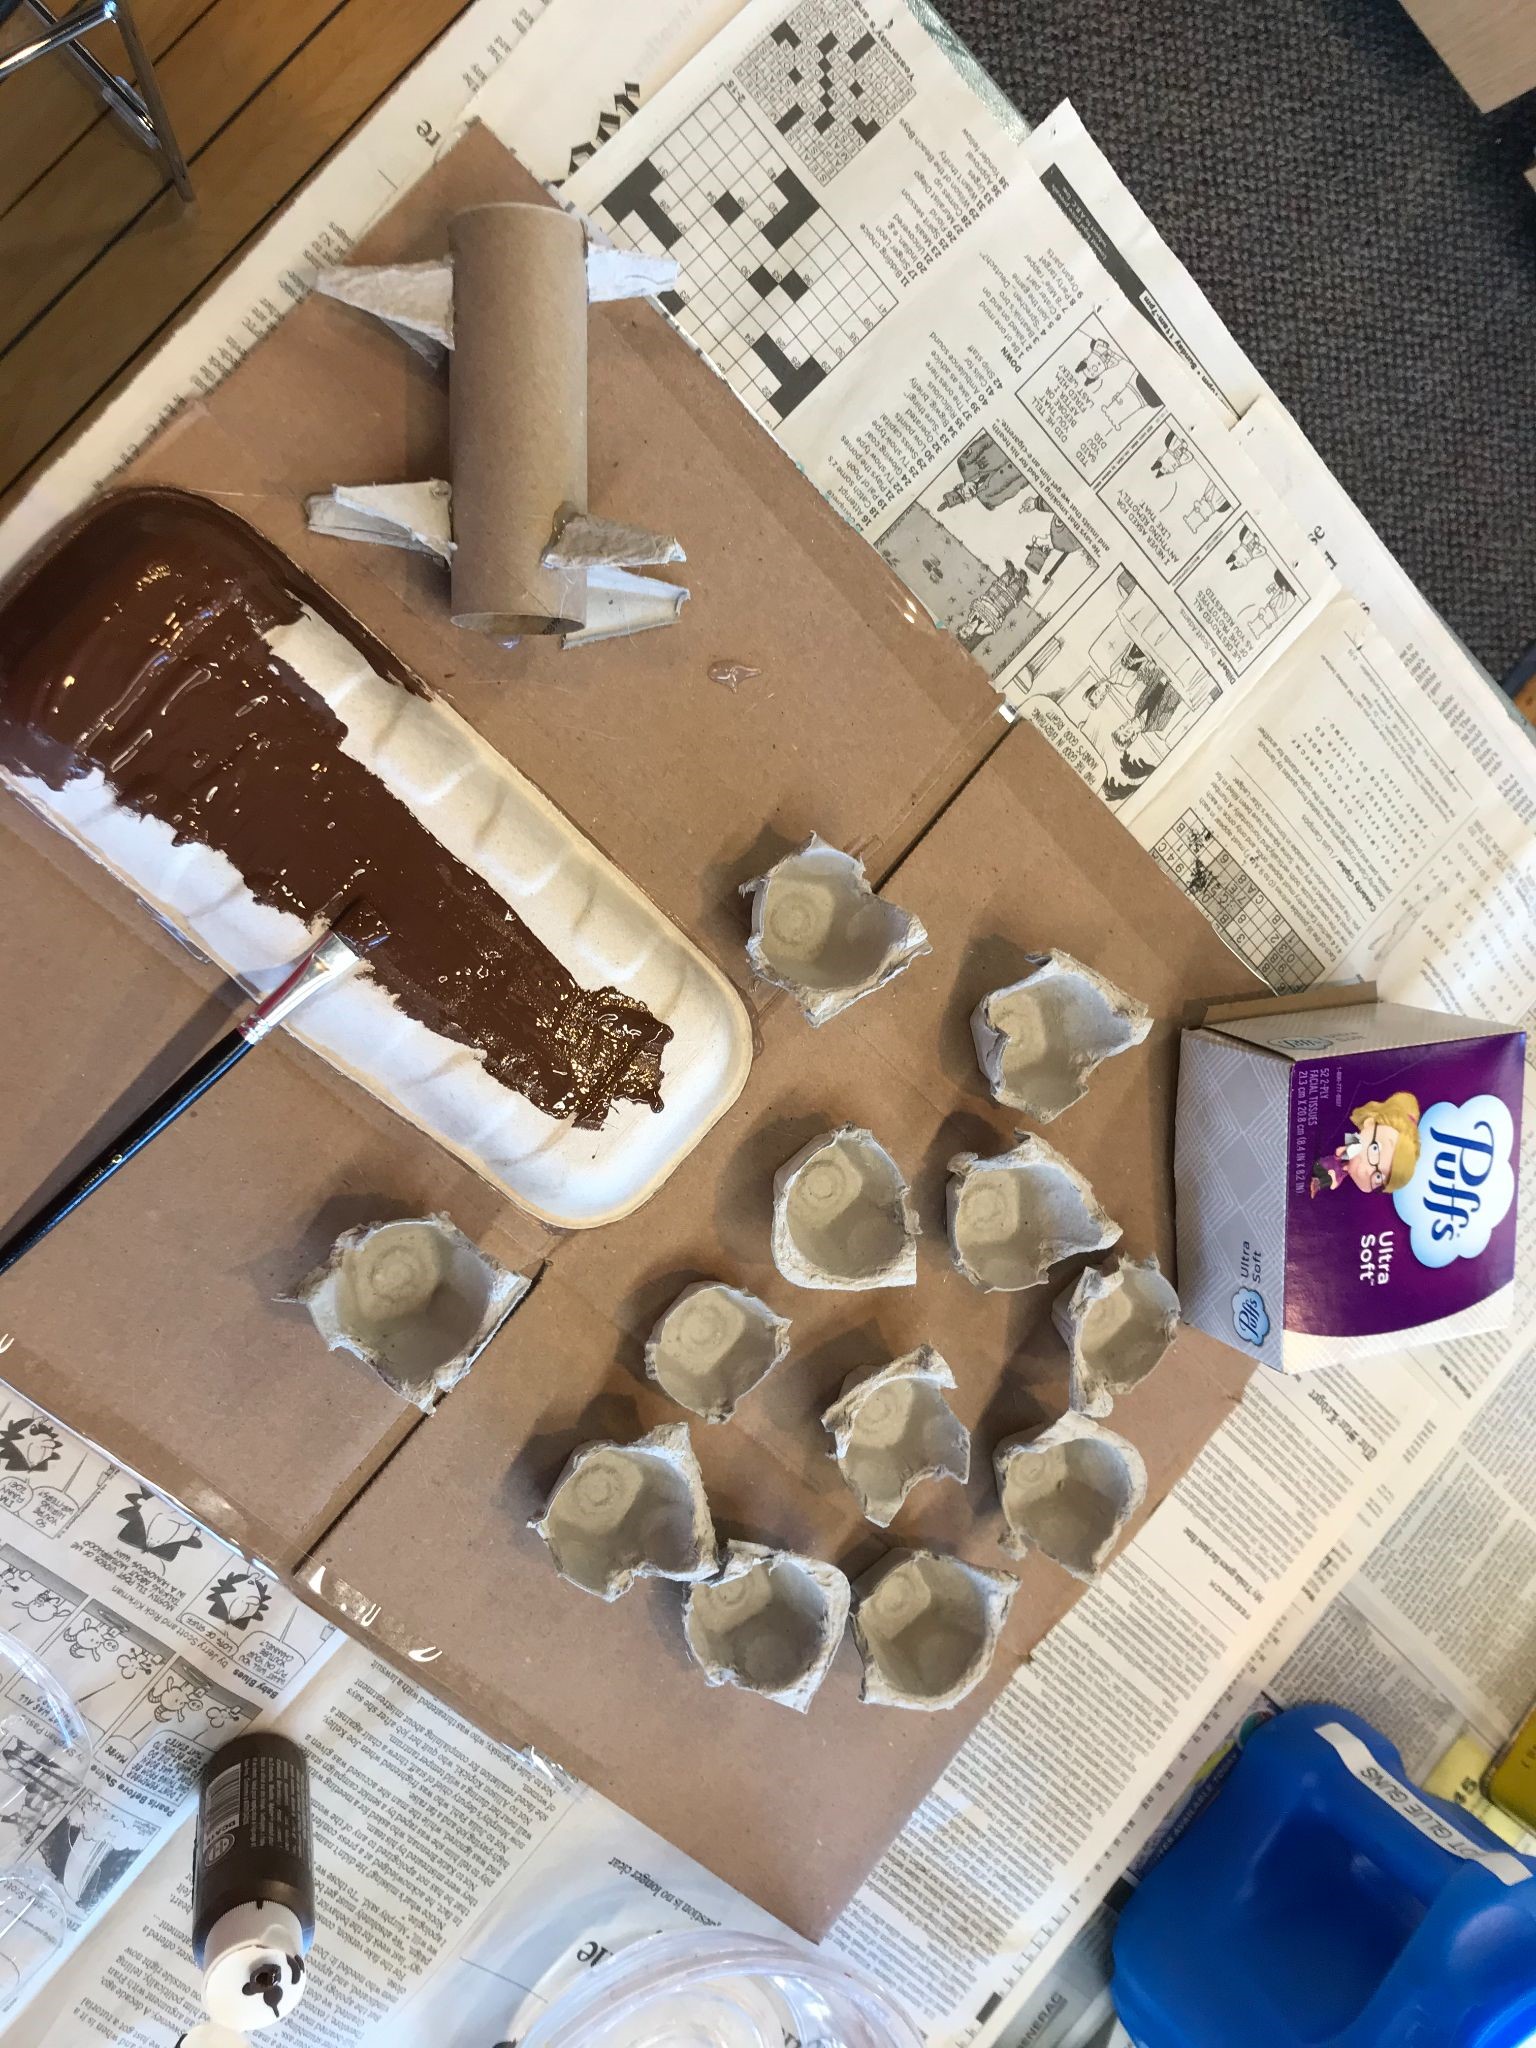
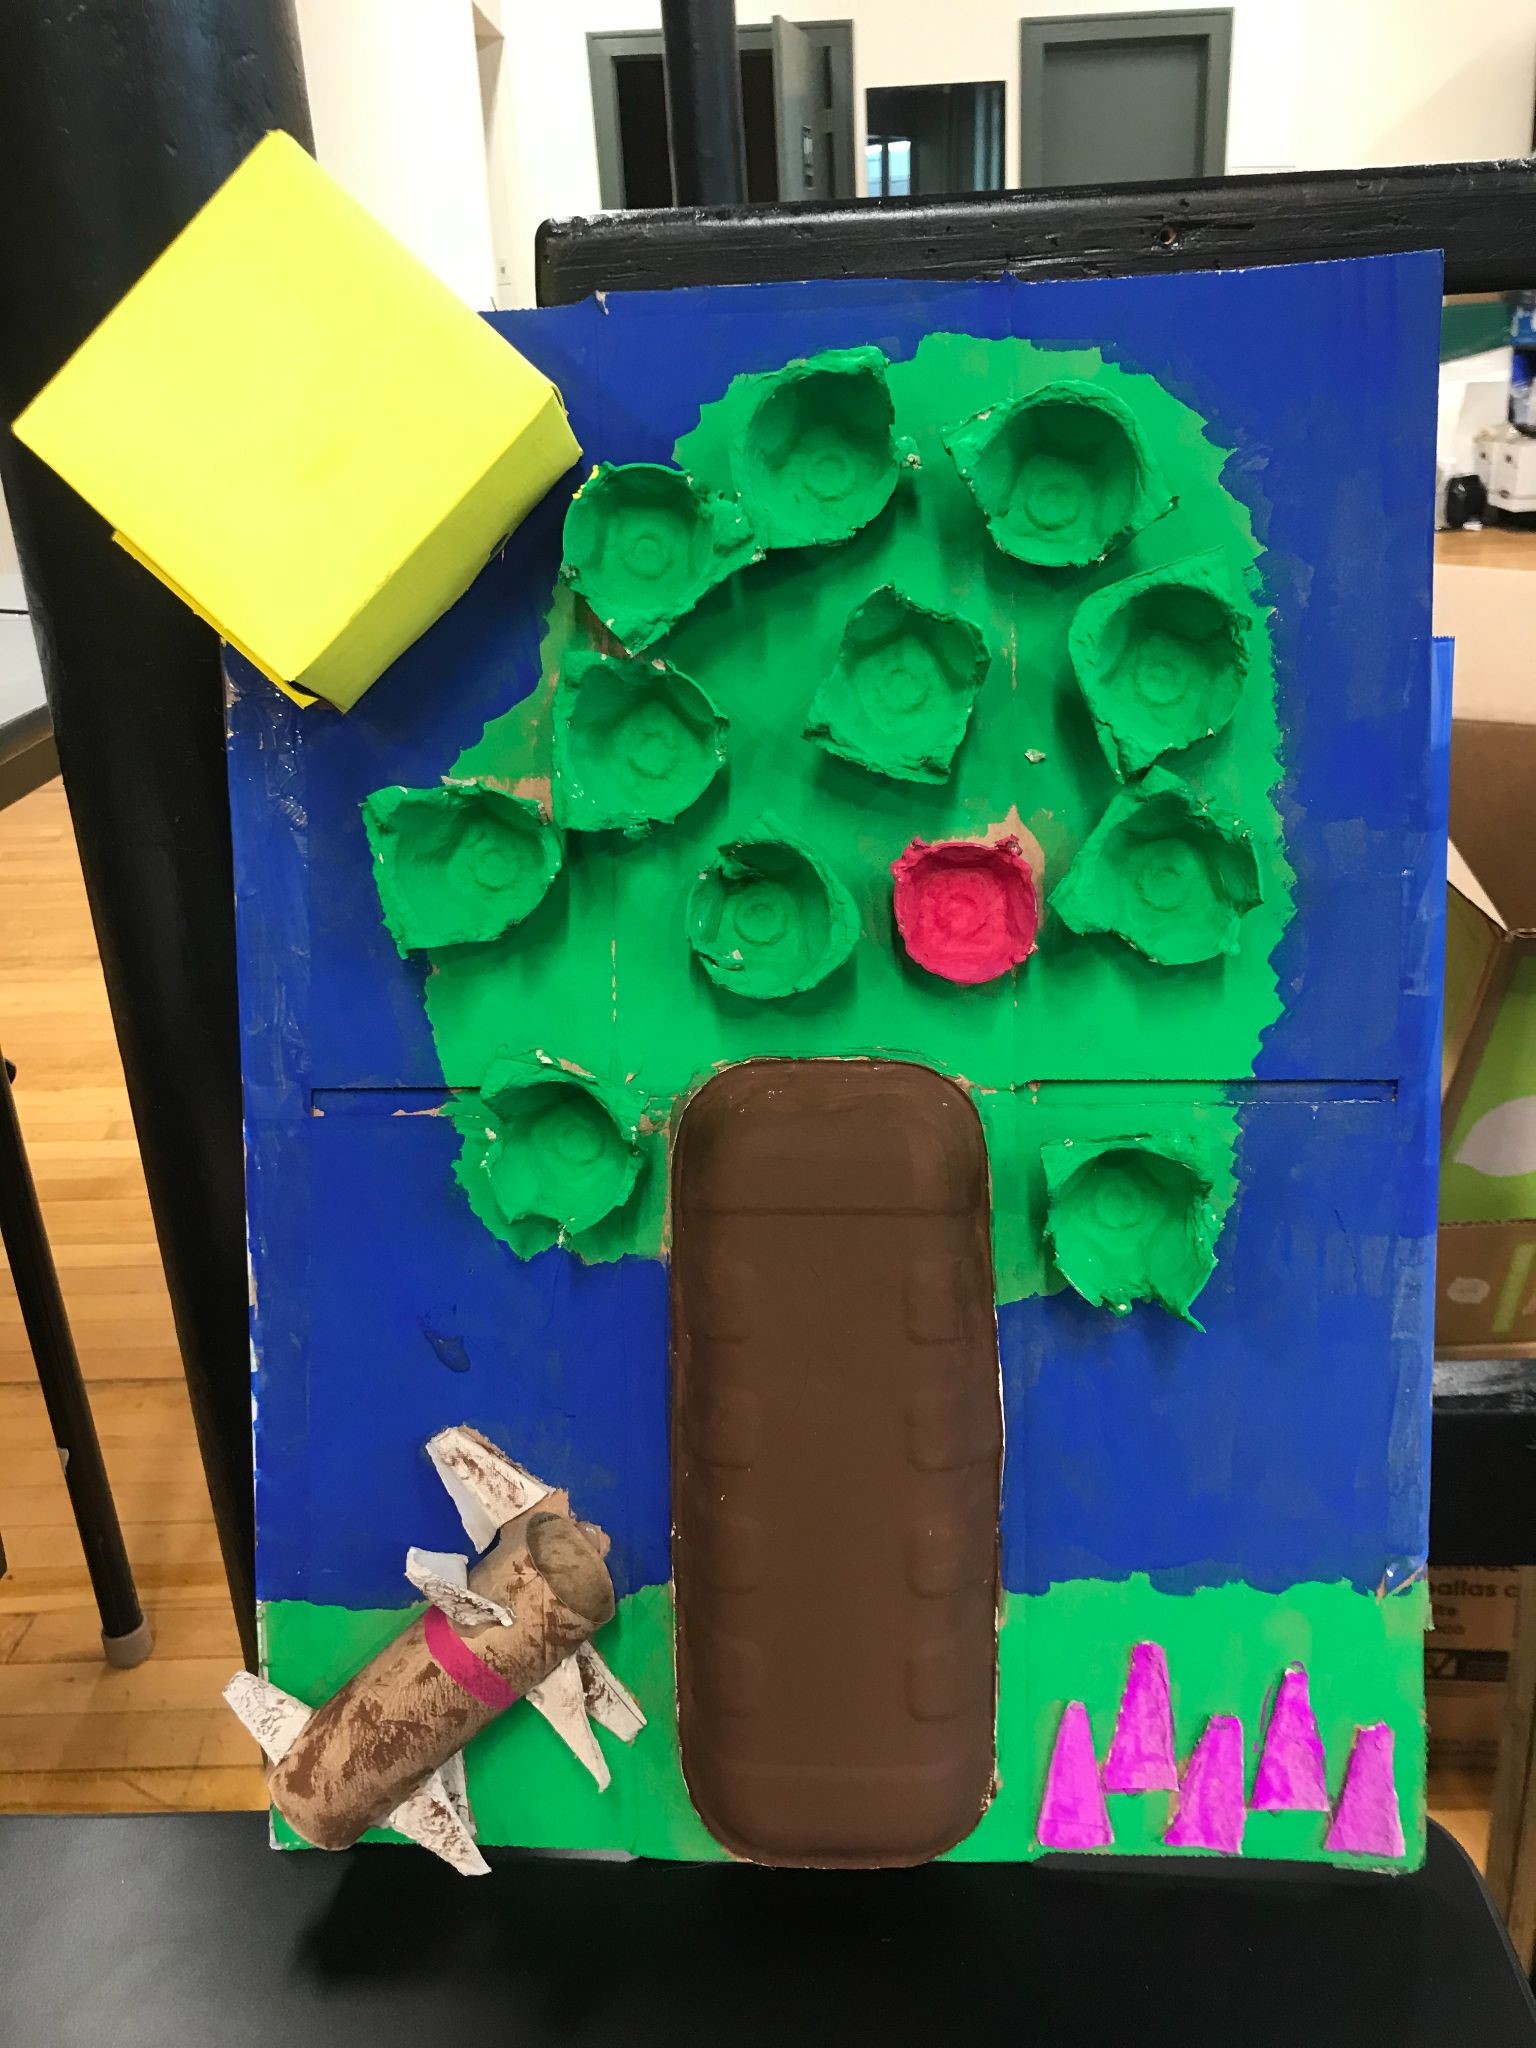
Recycled Egg Carton Tree Canvas
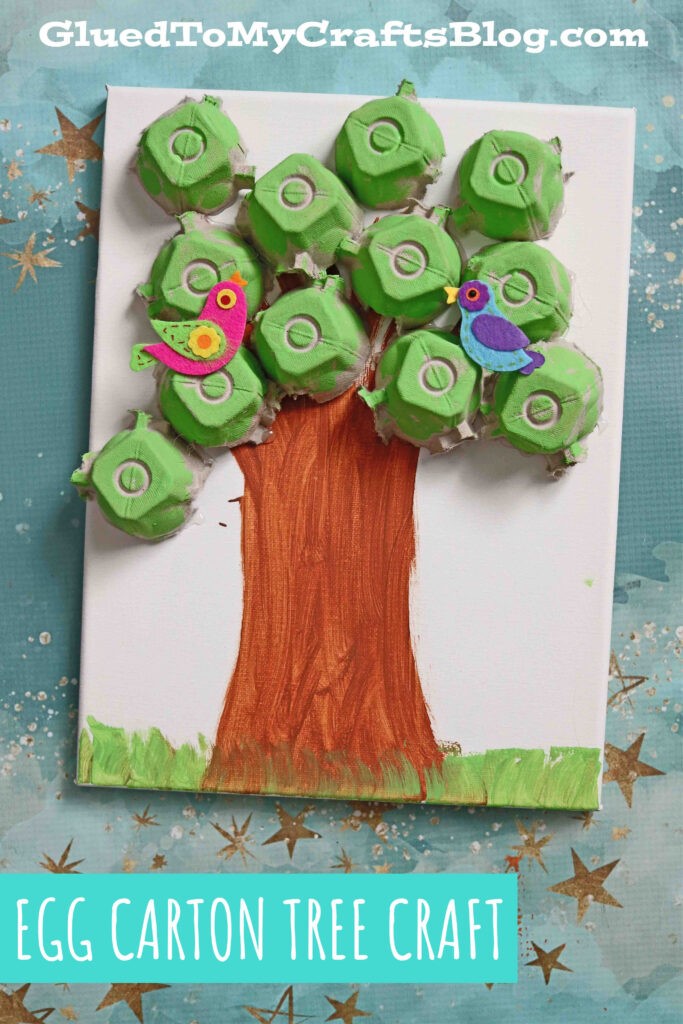
https://www.gluedtomycraftsblog.com/2014/04/egg-carton-tree-kids-earth-day-craft.html
Egg Carton Tree Canvas Craft Supplies:
* Empty, Clean Egg Carton
* other recycled materials to create a design
* cut the side of a box to serve as a base for your design
* Assorted colored paints
* Paint Brushes
* Craft Scissors
* Hot Glue Gun
* Glue Gun Sticks
Directions:
* Using your scissors, go ahead and trim out each individual section of the egg carton. (these will be the leaves of the tree
* other recycled items can serve as the trunk of the tree, the sun, plants, or other objects
* Let your child paint the egg carton pieces green, they can paint the other items they chose as well (the trunk can be brown, flowers can be purple, the sun can be yellow…
* Set them aside to let it dry completely.
* You can paint the top half of your cardboard base blue and the bottom half green.
*Set the cardboard base aside to let it dry completely
* Hot glue your painted pieces to the cardboard base
* Another option is to glue your unpainted recycled items first, and then paint the items once they are glued.
* Add any other embellishments you see fit {maybe some painted on apples, birds or cherry blossoms?}
* Display your egg carton tree decor piece proudly for all to see!
DIY: paper bag paintings – You could make it look like METC’s stained glass windows!
http://smallforbig.com/2013/09/diy-paperbag-paintings.html
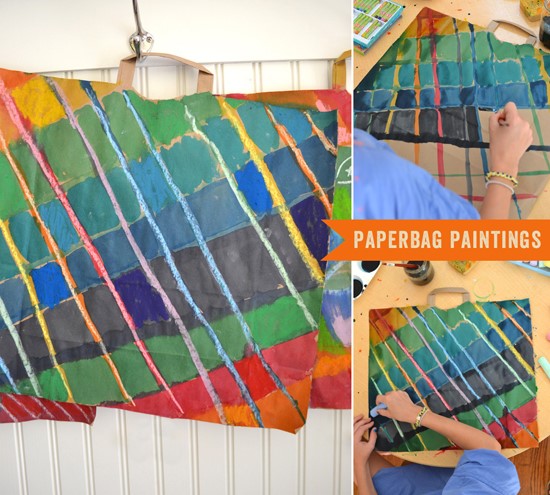
Supplies:
- Paper bags
- Liquid Watercolors + paint brush
- Oil pastels (optional)
- Chalk
Making your paper bag art:
Step 1:
Cut your paper bag down the side along a fold. Cut off the bottom. Open the bag up and get the creases out as much as possible by folding the folds in the opposite direction.
Step 2:
Set out the watercolor paints, brushes, damp sponge and glass of water. Let the kids paint, covering the whole page. When they are finished, let the paintings dry a bit before adding the next layer. (They can either be just about dry, or completely dry, but if they are too wet the paper might tear when adding the next layer.)
Step 3:
Next, set out your chalk and oil pastels and let the kids add to their paintings.
Step 4:
Let dry and then enjoy!
Earth Day Activities: Earth Crayons – A great way to re-use your old crayons!
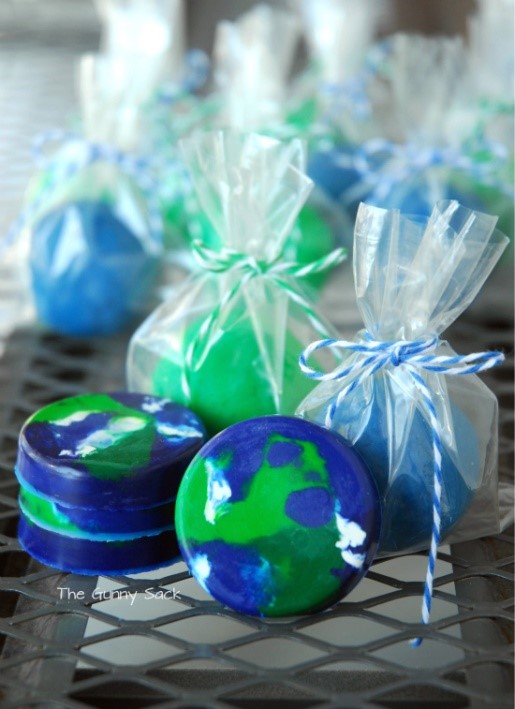
https://www.thegunnysack.com/earth-day-activities-how-to-make-crayons-play-dough
Supplies:
Old crayons
Muffin tin
Oven
Step One:
Preheat the oven to 250°F. Peel the wrapper off of blue, white and green crayons
Step Two:
Break or cut the crayons into small pieces.
Start by putting a few white pieces in the bottom of a muffin tin. Top the white pieces with the green and blue pieces.
Step Three:
Bake them at 250°F for 15-20 minutes, until the crayons are melted.
Carefully remove the muffin tin from the oven without mixing the colors. Allow the crayons to cool on the counter and then put them in the fridge for 30 minutes.
Remove the crayons from the fridge, turn the muffin tin upside down and give it a smack on the counter to pop the crayons out.
RECYCLED MATERIALS ART WALL – Try this out with siblings or friends for a group artwork!
https://www.artbarblog.com/recycled-materials-art-wall/
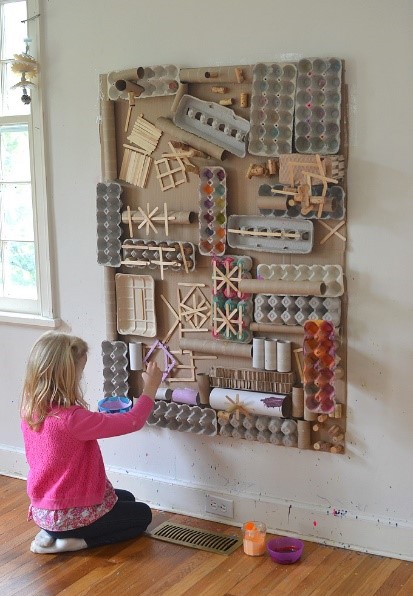
SUPPLY LIST FOR RECYCLED ART WALL
~ Anything and everything cardboard! Egg cartons, toilet rolls, paper towel rolls, packaging, milk cartons, berry containers, cardboard scraps, corks, craft sticks
~ A giant piece of cardboard
~ Glue gun (I buy the low-temp to curb burned fingers)
~ Tempera paint
~ Jars and bowls for mixing
Step 1:
- Using the recycled materials, glue them to the giant piece of cardboard
- Hotglue – doesn’t need too much time to dry
- Traditional white glue will require an overnight rest period to dry
Step 2:
- Mix your paint colors together
- Using the paint, create a design by adding different colors to your cardboard design
Step 3:
- Allow to dry
- Then hang up and enjoy! You can use clear packing tape at each corner to affix the artwork to the wall
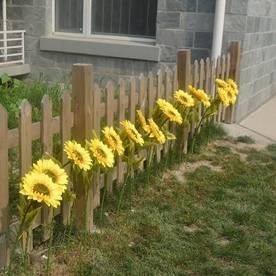
The general rule of thumb for planting your sprouted seedlings in the ground is after Mother’s Day. Your little sprouts have been growing in a warm safe environment, and waiting to plant them in the ground outside until after Mother’s Day helps protect them from any damage that might occur with a late spring frost.
This little sprouted seed will grow into a sunflower! It is still a little small but once the warm weather picks up it will grow nice and strong and hopefully flower!
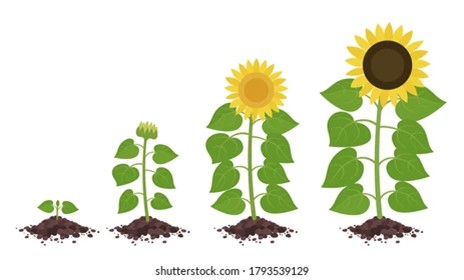
With enough sunlight and gentle watering, this little plant will grow into a beautiful sunflower in late July or early August.
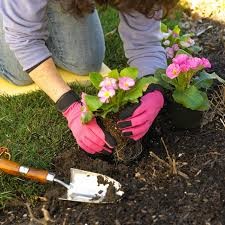
Step 1:
Have an adult help you pick a nice spot with lots of sun in your garden. You will need to dig a hole that is big enough for your sunflower sprout and the dirt that is keeping the roots safe.
Before you put the plant in the ground, use a watering can and pour a generous amount of water in the hole.
Step 2:
After you put your plant in the ground, make sure you water it every day (you won’t need to water if it is raining outside). Water helps the roots stay strong and the roots will need extra support for the first few days so they keep growing.
Step 2:
After you put your plant in the ground, make sure you water it every day (you won’t need to water if it is raining outside). Water helps the roots stay strong and the roots will need extra support for the first few days so they keep growing.
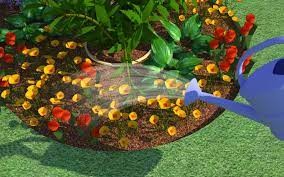
Step 3: As the weather gets warmer, make sure the soil around your plant is never too dry. Plants need water to survive, and water will help your plants grow big and strong like these sunflowers!
Step 4:
Don’t forget to share progress photos of your plants with METC on our Facebook page. We would love to see how big and strong your plants have grown over the last few months.
Happy Planting!
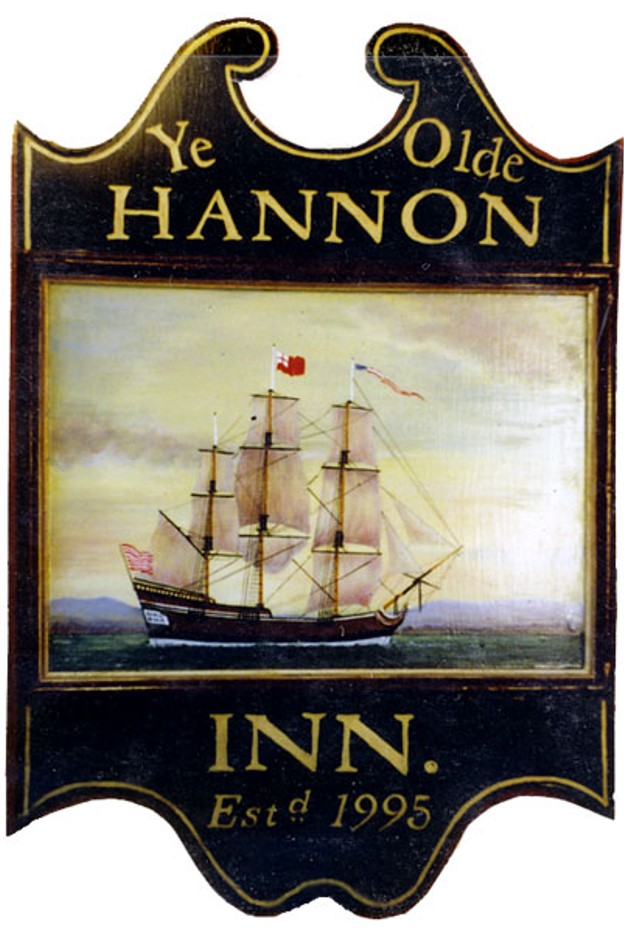
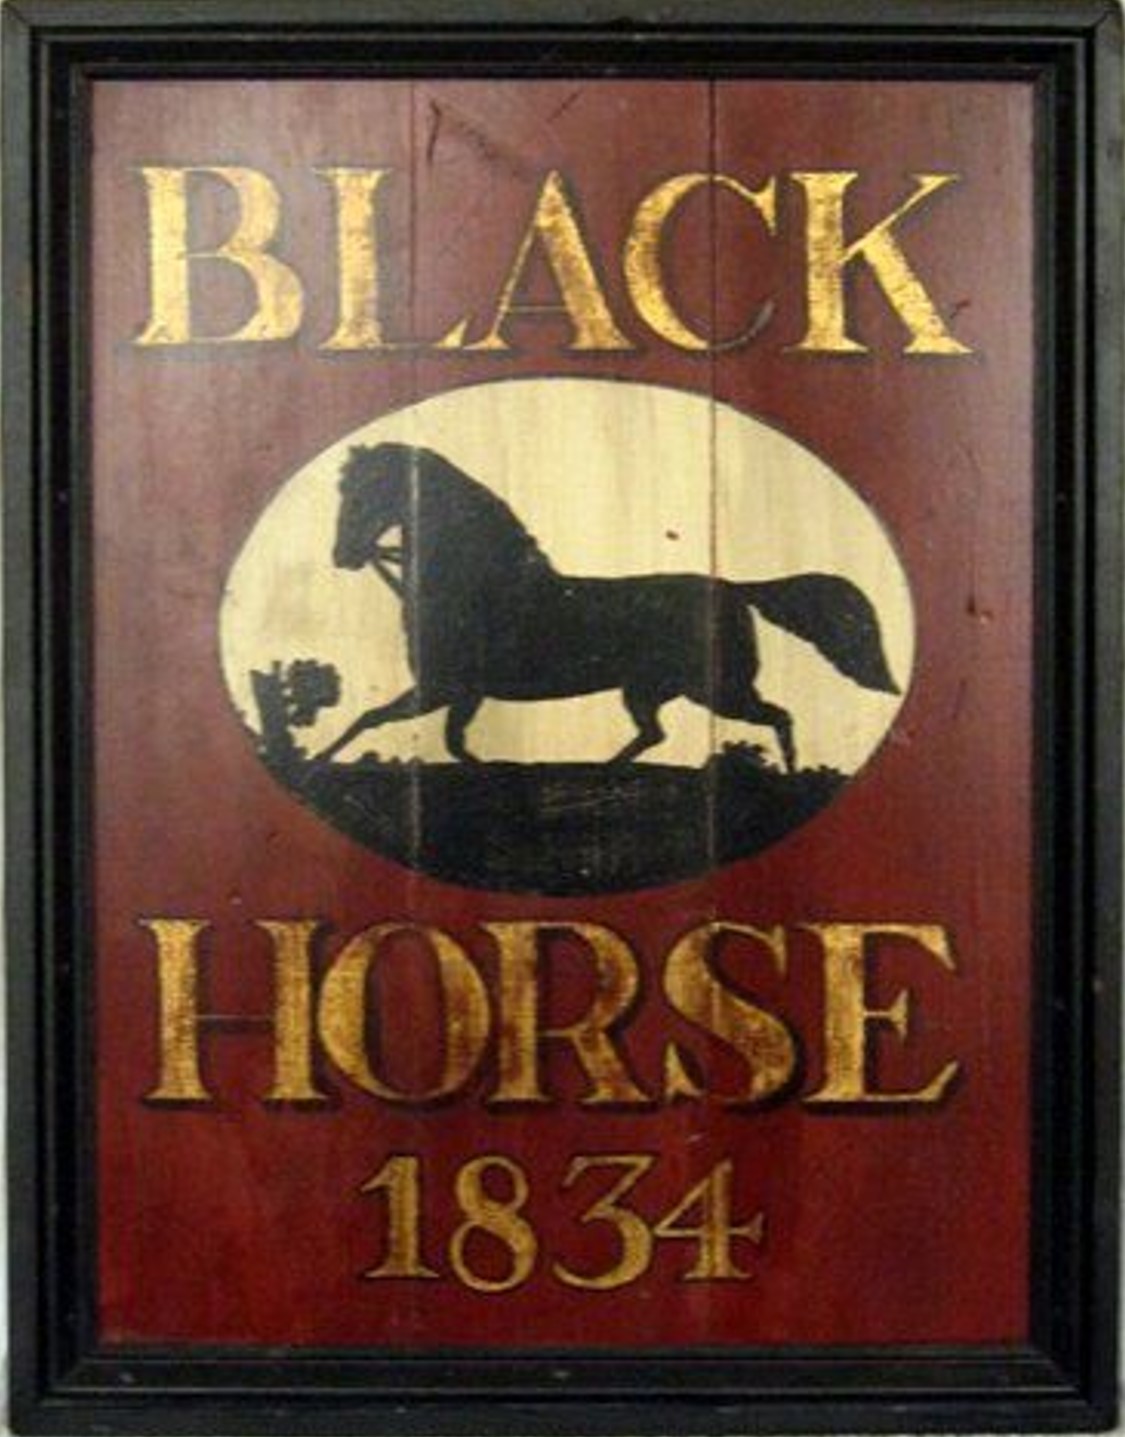
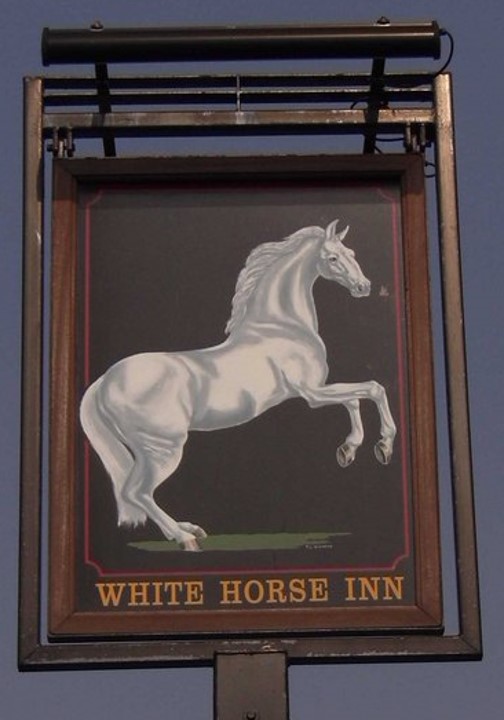
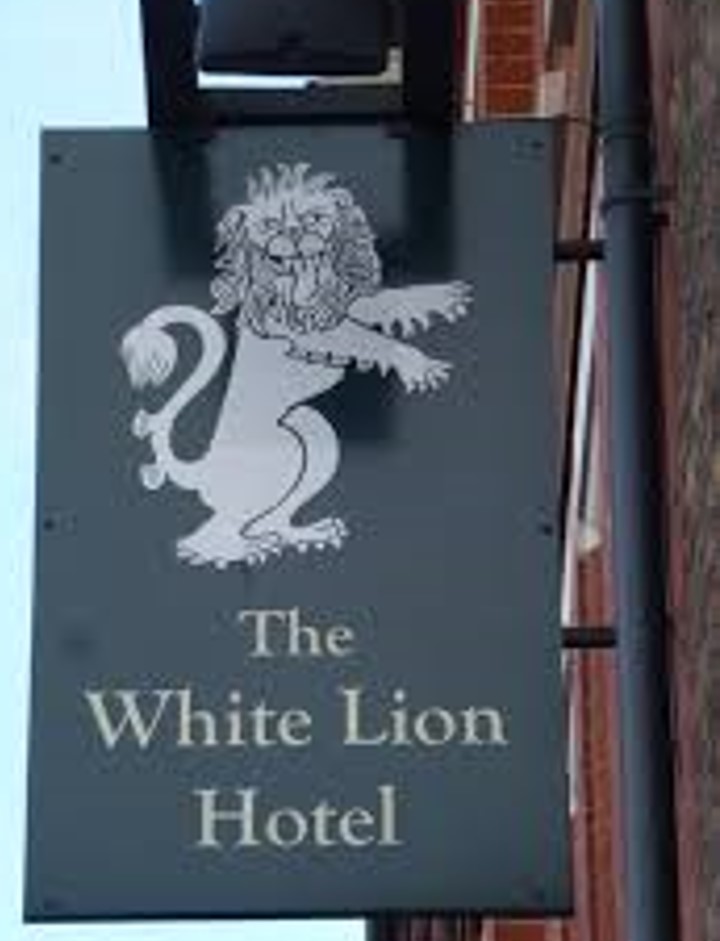
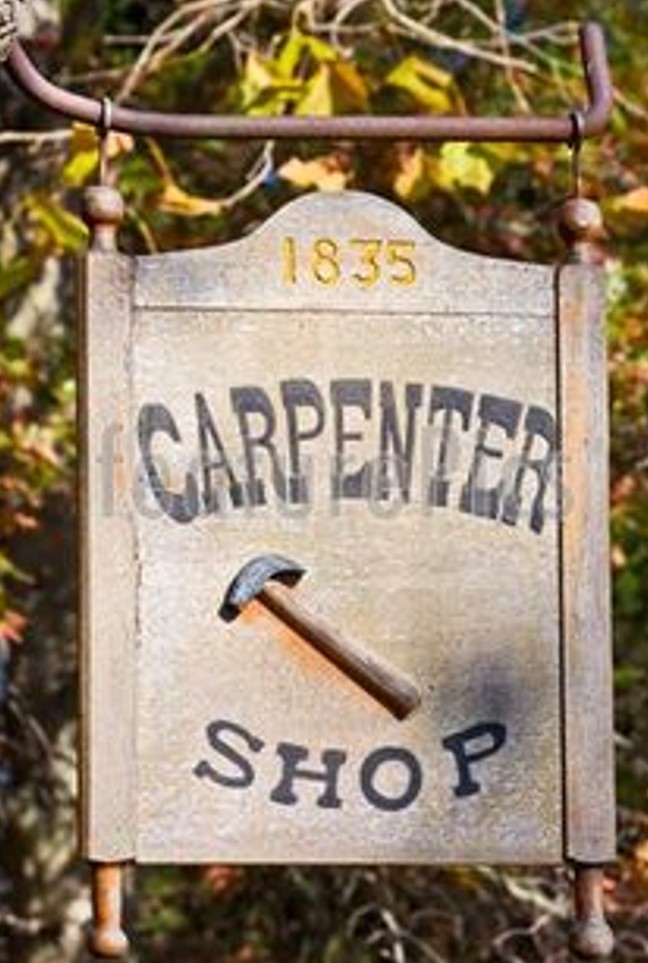
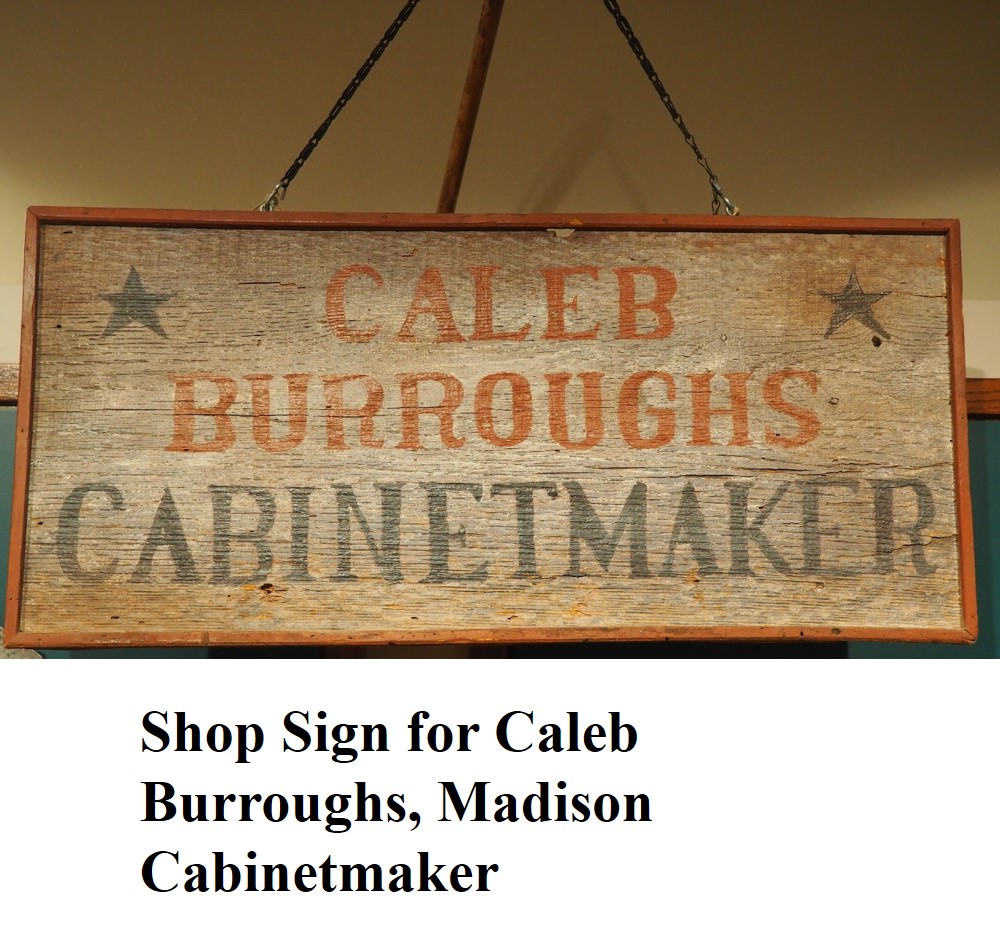
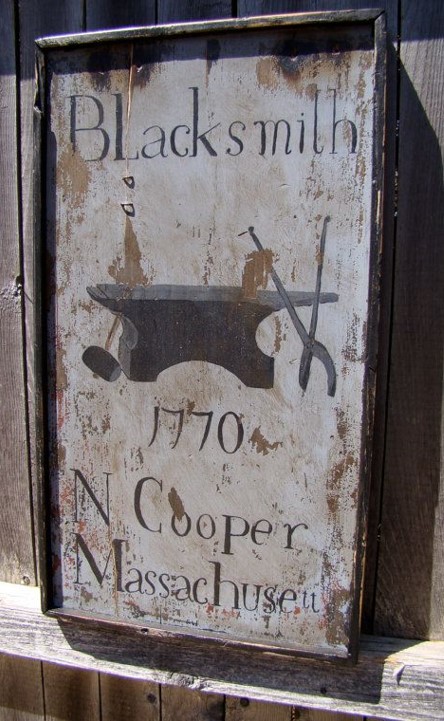
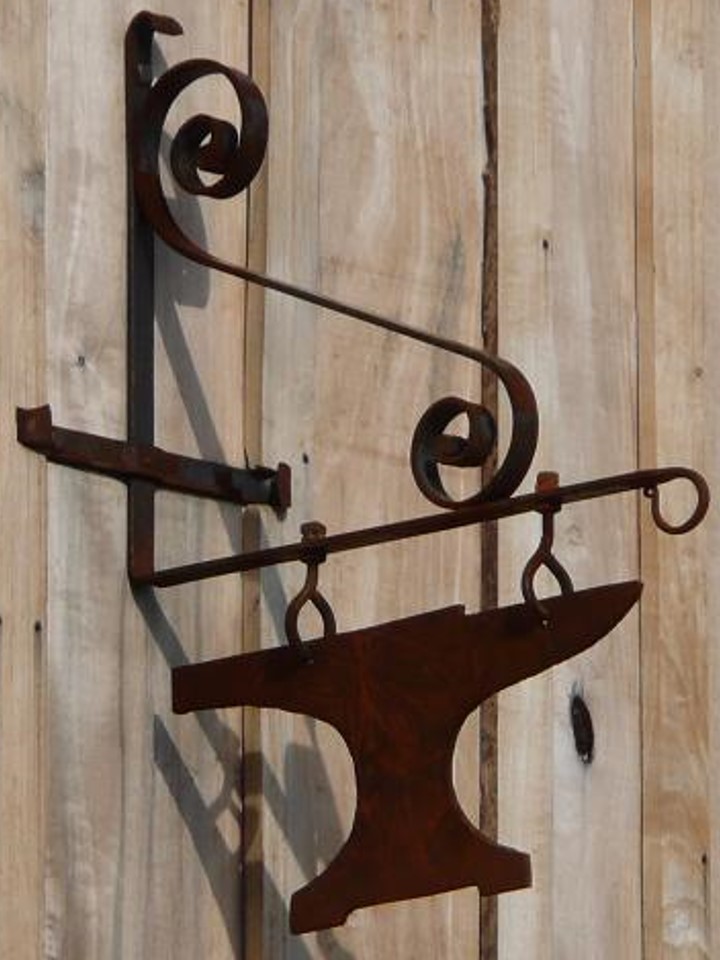
Shops, restaurants, hotels and other businesses have been putting out signs to attract customers for hundreds of years. These signs vary greatly, but they all share the goal of getting people to come inside. To achieve this goal, they need to be:
- Catchy, so that people passing by give it a second look
- Informative, so potential customers know what they will find inside
Just like today, most shops in the 1700s and 1800s had signs. Not everyone could read, so a good sign let customers know what was inside without words. Recognizable symbols and logos are still common on signs today! Now it’s your turn to create a shop sign!
- Decide what type of business you would like to advertise.
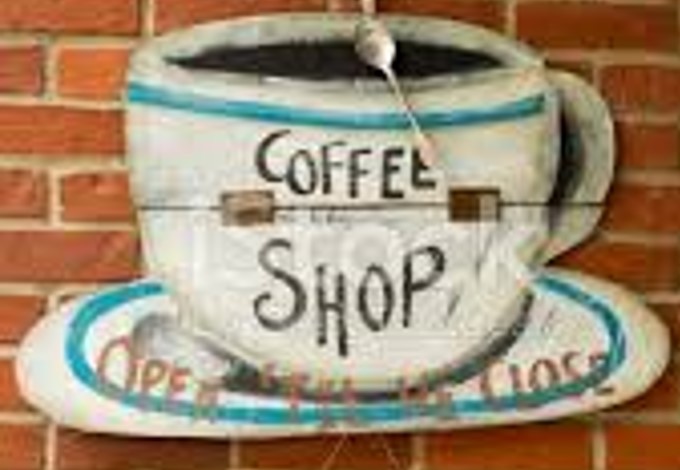
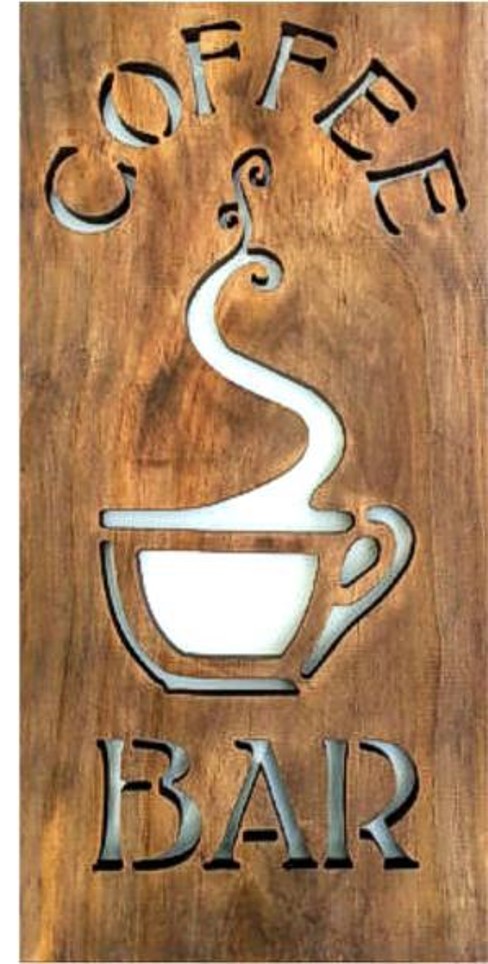
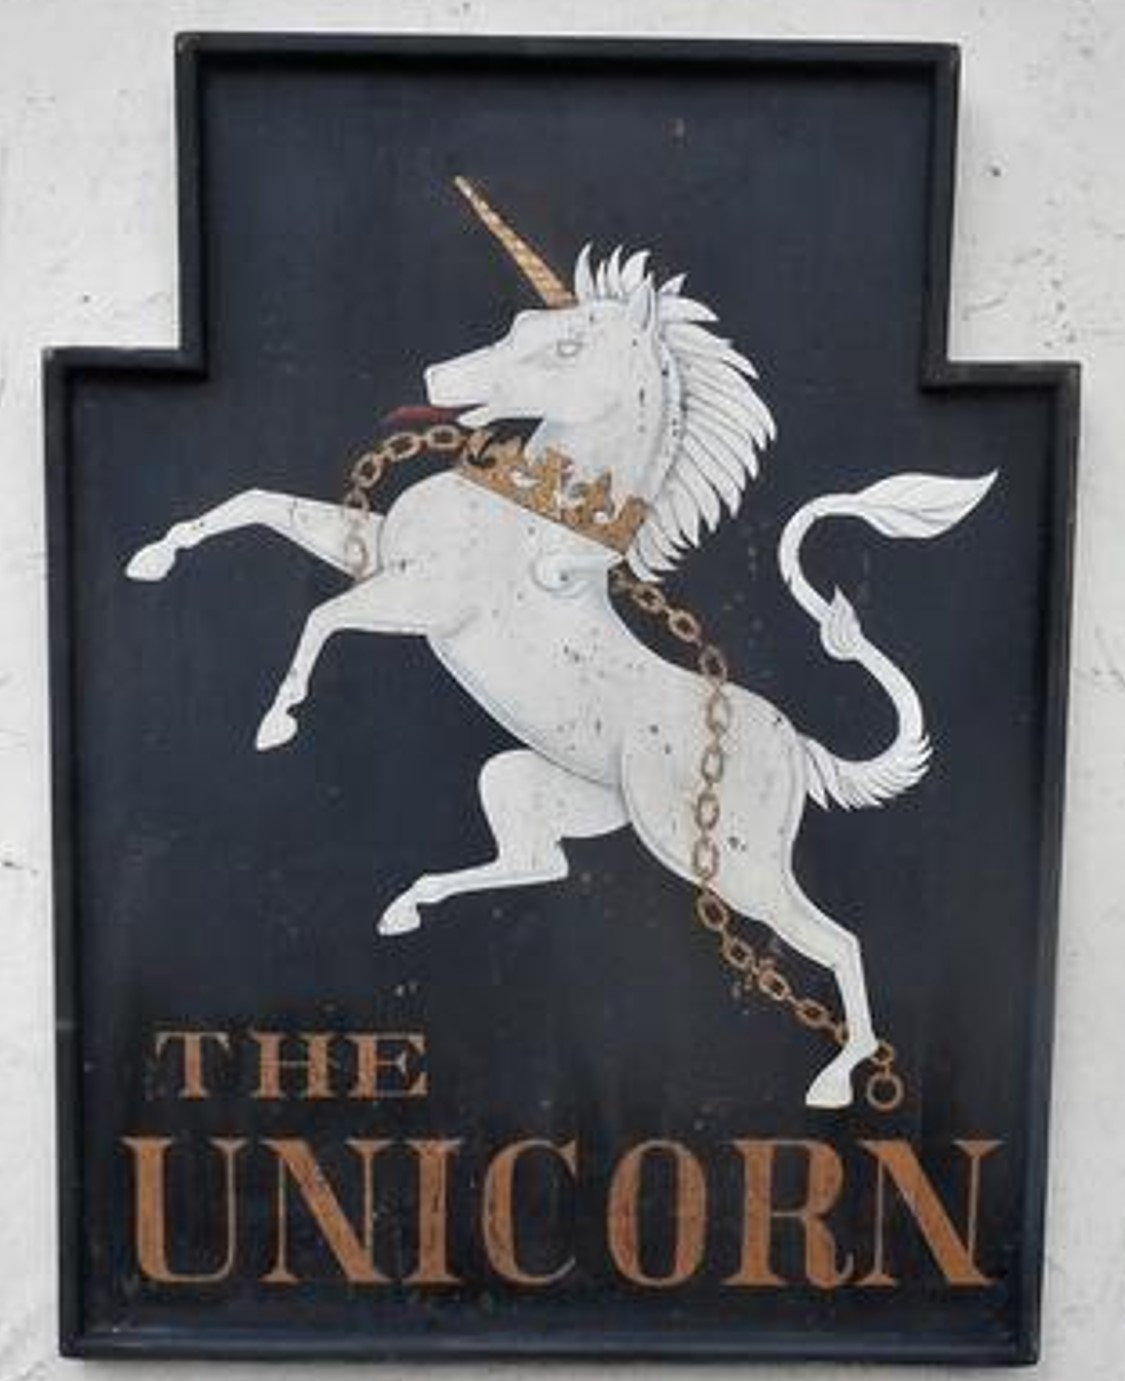
- Take a look at the sample shop signs to get some inspiration.
- Decide on the outline shape of your sign. You can print one of our templates or design your own. Either way, cardstock is best if you have it.
- Use pencil to sketch the design on your sign. *Remember, you are trying to catch someone’s attention, possibly from far away, so use simple, recognizable images and few words.
- Once you are satisfied with your design, add color! You can use paint, marker, crayon, colored pencil, pastel or anything else you have available.
- Hang your sign up somewhere and see if your family can tell what you are advertising
- Post a photo of your finished sign and share it with METC using #metcnj or tagging us @metcnj
Shop Sign Template 1 | Shop Sign Template 2 | Shop Sign Template 3

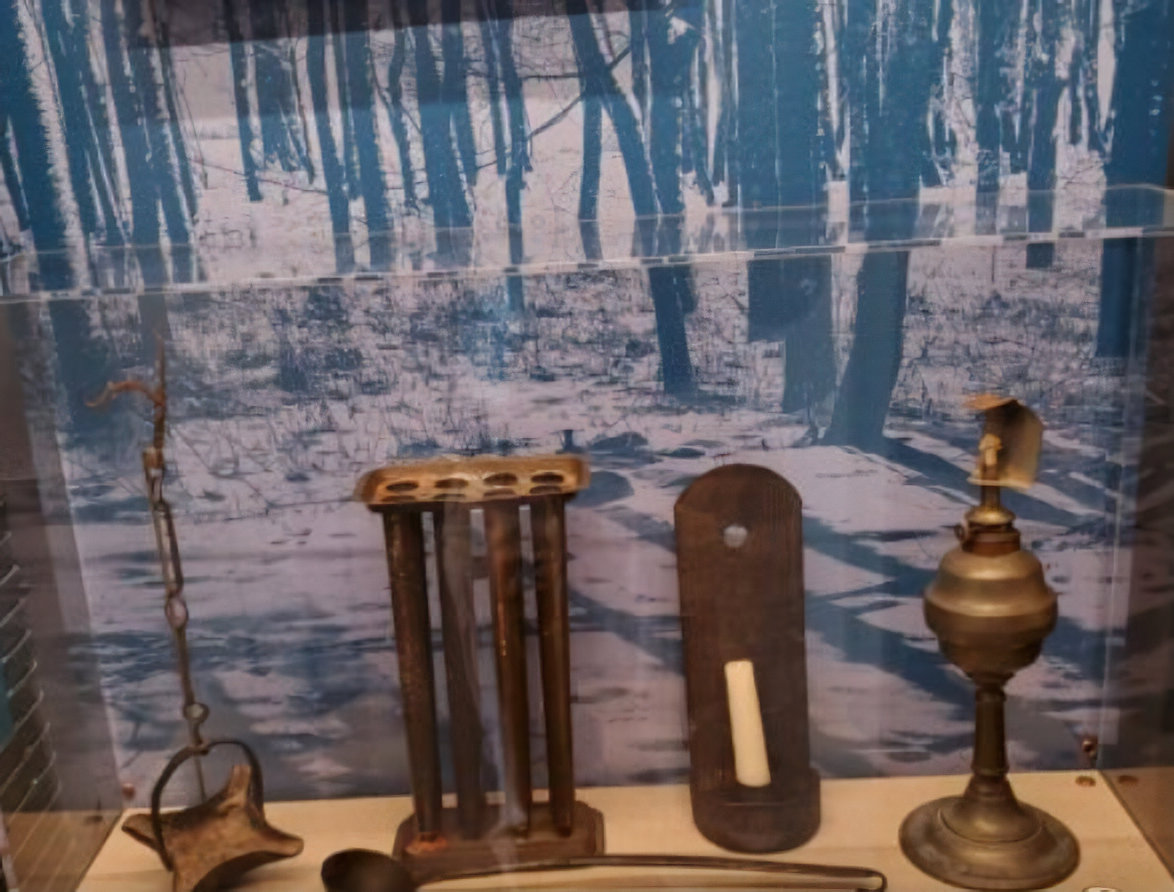
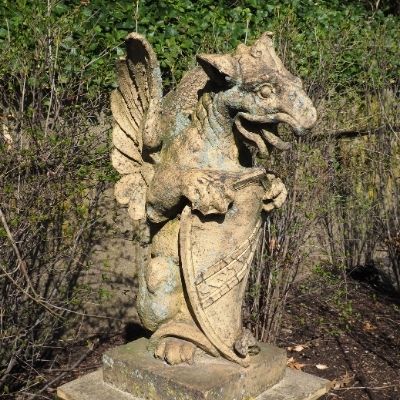
Griffins and gargoyles, oh my! METC’s home, the James Library Building is decorated with architectural features like gargoyles and the James Building, home of the Education Annex, was once topped with terracotta griffins. One of the terracotta griffins can be found in METC’s garden. Griffins are mythical creatures that are part eagle and part lion. Images of griffins can be found in ancient sculptures from Egypt and Mesopotamia and were extremely popular in Medieval imagery. Griffins symbolized strength and bravery.
Gargoyles served an architectural purpose as well as a decorative one. Many served as gutter systems that directed water away from the sides of the building. The gargoyles on the James Library building are just decoration.
Enjoy these coloring pages, puzzles, and activities all about griffins and gargoyles
Mythical Creature Word Search | Decorate Your Own Griffin | Welsh Griffin Coloring Page | DIY 3D Gargoyle | Build Your Own Griffin
Enjoy a tea party at home with your family with the help of these activities from MET(ea)C! 
Hosting a Victorian Tea Party | Tea Party Invitation | Tea Party Word Search | Design Your Own Tea Set | Decorate Your Own Tea Set
You Will Need:
- Heavy Cream
- A small jar
- Salt (optional)
Directions:
- Fill the jar about half way with the heavy cream (adding salt to taste if you would like)
- Shake for about 15-20 minutes continuously or until you get a (relatively) solid blob of butter surrounded by butter milk
- *In warmer weather, the butter may not ever fully separate from the butter milk and you will have something closer in consistency to a butter spread*
You Will Need:
- 1 cup light cream or half and half
- 1 cup heavy cream
- 1/4 cup sugar
- 1 teaspoon vanilla extract
- Ice cubes
- 1/2 cup salt (Kosher or rock salt)
Directions:
- Measure the cream, sugar, and vanilla extract into the quart-size bag. Zip it up tightly.
- Fill the gallon-size bag with ice. Add the salt.
- Put the sealed smaller bag inside. Now zip up the larger bag.
- Shake and shake the bags to make ice cream! It will take about 10 minutes until the cream hardens.
Take the smaller bag out of the larger one. Eat the ice cream right out of the bag or scoop it into a bowl. Recipe courtesy of Kidstir.com
You Will Need:
- For best results, use Mexican chocolate (brands include Ibarra, Abuelita, and Morelia, among others). Mexican chocolate is darker than its American counterpart and frequently contains ground almonds or pine nuts and cinnamon.
Directions:
- Break 1 tablet of the chocolate and place into a deep pot
- Add 1 cup water (You can also use milk but water is the more traditional ingredient).
- Heat the water to boiling, stirring the chocolate until it melts. The result will be somewhat grittier than other chocolate drinks.
- Add, to taste, cinnamon, a vanilla bean, and a small piece of chili.
- Using a whisk or electric mixer to whisk the chocolate until a thick froth forms.
Recipe courtesy of Penn Museum
You will need:
- 1 cup salt
- 1 cup warm water
- 2 cups flour
- 1 teaspoon vegetable oil
- A few drops of food coloring (optional)
- Large bowl
- Large spoon for mixing
- Plastic or dull table knife
- Rolling pin or soup can
Directions:
- Measure all ingredients into the bowl and mix thoroughly. Leave the dough to dry for a few minutes.
- Put down wax paper and sprinkle some flour on it
- Knead the dough until it’s smooth.
- Roll out the dough until it is nice and flat
- Press your cookie cutters into the dough
- Leave the cutter in place while you use the knife to cut away the dough around the cutter
- Leave the “cookie” to dry on the wax paper
You will need:
- Baking sheet
- Aluminum foil
Directions:
- Set your oven to 200 degrees Fahrenheit, and let it preheat for several minutes.
- Cover the bottom of a baking sheet with aluminum foil.
- Set the play dough carefully in the middle of the foil covered baking sheet. Place the baking sheet into the preheated oven.
- Allow the play dough to bake for about 10 to 15 minutes. This helps pull the moisture from the dough, making it harden faster.
- Turn the oven off and do not open the oven door or remove the baking sheet from the oven. Let the play dough sit in the oven overnight.
- Remove the hardened figure from the oven.
Courtesy of www.ehow.com
Old Sturbridge Village in Sturbridge, MA is the largest outdoor history museum in the Northeast. They depict rural life in 1830s New England. Their historic interpreters have created a series of videos depicting how to create historic recipes.
